The latest info on influencer marketing trends, micro influencer news, and the world of social media

In the fast-paced world of online business, staying ahead means continuous learning. For e-commerce brands, Amazon sellers, and DTC founders, the right marketing book can spark game-changing ideas. In this guide, we’ll highlight the best marketing books to read in 2025 – from classics on branding strategy to new insights on micro influencers and content creation. These books will help you master influencer marketing, harness user-generated content (UGC), and refine your overall strategy to drive growth. Read on to discover what you’ll learn from each title and how it can elevate your marketing ROI.
Hook for our audience: As an e-commerce entrepreneur or marketer, you juggle social media trends, algorithms, and consumer behaviors that evolve constantly. Marketing books condense decades of expertise into actionable advice. By learning directly from top marketers and thought leaders, you gain frameworks to outshine competitors – whether through a smarter influencer marketing plan or a more compelling brand story.
What you’ll learn: This article covers 10 must-read marketing books (including new releases and timeless classics) that can transform your approach. You’ll learn how to craft content that customers love, build a memorable brand, leverage micro influencers for authentic promotion, and optimize every marketing dollar for maximum ROI. Let’s dive into our top picks and see how each can benefit your e-commerce strategy in 2025.
To start, here’s a quick comparison of our recommended books, their focus, and why they’re worth your time:
Book (Author)
Key Focus
Why Read It
Influence (Robert Cialdini)
Persuasion psychology
Learn the triggers that drive customer decisions
Positioning (Al Ries & Jack Trout)
Branding strategy
Stand out in a crowded market with a unique brand angle
Blue Ocean Strategy (W. Chan Kim & Renée Mauborgne)
Market innovation
Find untapped markets away from cut-throat competition
Contagious (Jonah Berger)
Viral marketing
Create products & content people naturally share
Everybody Writes (Ann Handley)
Content creation
Improve your writing to engage and convert audiences
Epic Content Marketing (Joe Pulizzi)
Content marketing
Build trust and leads with valuable, story-driven content
The 1-Page Marketing Plan (Allan Dib)
Small-biz strategy
Map out a simple, actionable marketing plan in one page
Hacking Growth (Sean Ellis & Morgan Brown)
Growth hacking
Scale up like a startup with rapid experiments & analytics
The Age of Influence (Neal Schaffer)
Influencer marketing
Leverage influencers (mega and micro) to boost credibility
Building a StoryBrand (Donald Miller)
Brand messaging
Clarify your message and connect with customers emotionally
Next, let’s explore each book in detail and how it can help e-commerce brands and Amazon sellers achieve marketing success.
View this post on Instagram A post shared by Robert Cialdini (@teamrobertcialdini)
When it comes to understanding why customers say “Yes,” Cialdini’s Influence is unmatched. This classic introduces six principles of persuasion – including social proof, reciprocity, and scarcity – that explain consumer behavior. Marketers widely recommend Influence for its deep dive into human psychology and practical examples. By applying its lessons, you can make your campaigns more compelling and trustworthy.
Why it’s useful for e-commerce: In online marketing, trust is everything. Influence teaches you how to build credibility and reduce buyer hesitation. For instance, leveraging social proof (like reviews or micro influencer testimonials) can significantly boost conversions. As you connect with content creators or micro influencers, understanding these principles helps ensure your collaborations genuinely sway your audience. In short, this book gives you a psychological playbook to persuade customers ethically and effectively – a must-have skill for Amazon sellers and DTC brands alike.
Originally published in the 1980s, Positioning remains a branding bible. Ries and Trout outline how to plant your product in the customer’s mind in a way that differentiates it from competitors. According to Invesp, this book is essential for mastering brand perception and competitive messaging. The core idea: rather than trying to be everything to everyone, focus on owning a specific concept or niche in your market.
Why it’s useful for e-commerce: Online markets (from Shopify stores to Amazon listings) are crowded. A clear positioning strategy helps your brand cut through the noise. Whether you sell sustainable pet products or artisanal coffee, Positioning teaches you to identify what makes you unique and communicate it powerfully. E-commerce brands that apply these lessons can create a lasting impression on customers, leading to stronger brand loyalty and higher lifetime value.
Why fight competitors over the same customers when you can sail into open waters? Blue Ocean Strategy argues that the best way to dominate is to create your own market space instead of battling in a saturated “red ocean.” The authors share frameworks and case studies showing how to find unmet consumer needs and innovate your offering. As marketing expert Neil Patel summarizes, this book teaches that success comes from identifying “new market spaces ready for growth,” not just head-to-head competition.
Why it’s useful for e-commerce: This strategic mindset is gold for Amazon sellers and brand owners. Rather than launching a me-too product, you’ll learn to spot gaps where customer demand is high but options are few. For example, you might combine product features or appeal to a niche community in ways competitors haven’t. Blue Ocean Strategy provides a roadmap to make your brand memorable and avoid pricing wars. By charting a fresh course, you can achieve higher profit margins and customer loyalty with less competitive pressure.
Ever wonder why some products go viral or get tons of word-of-mouth? In Contagious, Wharton professor Jonah Berger reveals the science behind social sharing. Through entertaining stories and research, he introduces six key principles (STEPPS) that make ideas spread: Social Currency, Triggers, Emotion, Public visibility, Practical Value, and Stories. You’ll learn practical techniques to design marketing content that people can’t help but share – whether it’s a clever ad or an engaging social media challenge.
Why it’s useful for e-commerce: In the age of social media and UGC, Contagious offers a blueprint for organic growth. If you want customers to rave about your product on Instagram or TikTok, this book shows you how. For instance, you’ll discover how to give your audience social currency (content that makes them look good when sharing), or how to trigger conversations about your brand through everyday cues. E-commerce products often live or die by reviews and referrals, so understanding viral drivers is invaluable. By applying Berger’s principles – perhaps encouraging happy buyers to post unboxing videos or creating shareable stories around your brand – you can exponentially increase your reach without huge ad budgets.
View this post on Instagram A post shared by Ann Handley (@annhandley)
Quality content is the backbone of modern marketing, and Ann Handley’s Everybody Writes is the ultimate guide to doing it right. Handley, hailed by Forbes as a top influential marketer, delivers clear strategies to elevate your writing across blogs, product pages, emails, and social media. This book reminds us that in marketing, “if you’re in marketing, you’re also involved in writing.” It covers everything from crafting compelling copy and calls-to-action to maintaining your brand voice.
Why it’s useful for e-commerce: Whether you’re writing Amazon product descriptions, email newsletters, or TikTok captions, strong writing can boost conversions. Everybody Writes teaches you how to communicate more clearly and persuasively, turning casual browsers into buyers. Handley’s tips on storytelling and simplifying your message are especially handy for content creators and brand founders who may not see themselves as “writers” by trade. By implementing her advice, you can create product listings and ads that resonate emotionally and drive action. As Neil Patel notes, this is a great read for any marketer looking to upskill their content creation game.
Joe Pulizzi is a pioneer of content marketing, and Epic Content Marketing is his playbook for building an audience that trusts and buys from you. The book emphasizes creating valuable, relevant content to attract and retain customers – rather than pushing constant ads. According to one expert summary, Pulizzi’s book is crucial for learning how to craft “value-first content that converts”. It covers how to develop a content strategy, tell your brand’s story, and distribute content effectively across channels.
Why it’s useful for e-commerce: In an era where consumers skip ads but seek advice and inspiration, content is king. If you run an online store, Epic Content Marketing helps you go beyond just selling products to becoming a go-to resource in your niche. Imagine running a home décor e-commerce site: by blogging DIY style tips or sharing UGC from customers’ decorated rooms, you build credibility and community. This book guides you on using blogs, videos, and social posts to draw customers in organically, which can lower your acquisition costs. Pulizzi’s insights are especially handy for those leveraging UGC and content creators – it’s about educating or entertaining first, and winning sales as a natural result of the trust you’ve built.
Small business owners and solopreneurs rejoice – Allan Dib simplifies marketing planning into a single page. The 1-Page Marketing Plan walks you step-by-step through creating a concise plan covering your target market, messaging, channels, and sales process. The beauty is in its simplicity: instead of a massive document, you distill your strategy into an actionable one-page grid. This approach has made the book a global bestseller in the marketing category. In fact, Huffington Post named it among the top ten marketing books for small business owners.
Why it’s useful for e-commerce: If you’re an Amazon seller or e-commerce startup, you often wear many hats and need quick wins. Dib’s plan is perfect for cutting through overwhelm and focusing on what matters. The book’s practical tips (like how to identify your highest-value customers or set up automated follow-ups) help you attract and retain buyers without a big team or budget. Many Amazon sellers appreciate this framework because it’s tailored to lean businesses – you’ll learn to maximize results with minimal waste. By the end, you’ll have a clear roadmap to get new customers and make more money, all on one page. It’s an essential read for entrepreneurs who want a fast, effective way to organize their marketing efforts.
Written by the duo who popularized the term “growth hacking,” Hacking Growth is a crash course in data-driven marketing and rapid experimentation. Sean Ellis (who coined “growth hacker”) and Morgan Brown share how companies like Dropbox, Airbnb, and LinkedIn achieved explosive growth by constantly testing and optimizing every aspect of their business. This book is often cited as “the best book on growth hacking” by industry insiders. It breaks down a repeatable process: analyze data for insights, generate ideas, test them quickly, and double down on what works.
Why it’s useful for e-commerce: The growth hacking mindset can transform how you approach your online store’s growth. Instead of relying on guesswork, you’ll adopt a culture of test-and-learn. For example, you might A/B test your product page layouts, experiment with different influencer partnerships, or tweak your checkout flow to reduce cart abandonment. Hacking Growth provides tactical guidance on forming a growth team (even if it’s just you and a colleague), running experiments on a budget, and focusing on metrics that matter (like conversion rate or customer acquisition cost). E-commerce brands can particularly benefit from chapters on optimizing user onboarding and leveraging existing customers for referrals. In short, this book teaches you to think like a lean startup, constantly discovering creative tweaks to scale revenue efficiently.
Influencer marketing isn’t just for big brands – it’s a powerful tool for small businesses and e-commerce sellers too. In The Age of Influence, Neal Schaffer demystifies how brands can leverage social media influencers (from mega celebs to micro influencers) to elevate their marketing. This 2020 book is considered “an essential guide for marketing professionals and business owners” to build effective and sustainable influencer campaigns. Schaffer explains how the rise of social media has democratized influence, and he provides a step-by-step plan to identify the right influencers, engage them, and measure ROI from influencer partnerships.
Why it’s useful for e-commerce: If you’ve been curious about influencer or micro-influencer marketing, this is the playbook you need. The book covers how even modest budgets can yield big results by tapping into niche content creators who truly connect with your target audience. For example, a small beauty brand might partner with a dozen micro influencers on Instagram or TikTok rather than one expensive celebrity – Schaffer shows how to do this at scale and authentically. He emphasizes relationship-building: turning your loyal customers into brand advocates and influencers in their own right. The advice is very actionable, including how to approach influencers, provide them with the right creative brief, and ensure campaigns are mutually beneficial. With UGC and authentic content on the rise, The Age of Influence gives e-commerce brands a roadmap to harness the trend (and even mentions tools and platforms that can help). Stack Influence, for example, is one platform that connects brands with micro influencers – a strategy very much in line with Schaffer’s principles of leveraging everyday advocates. By following this guide, you can expand your reach, build trust through real voices, and ultimately drive more sales through the power of influence.
View this post on Instagram A post shared by Business Educator + Author (@donaldmiller)
Last but definitely not least, Building a StoryBrand tackles one of the most crucial aspects of marketing: your brand message. Donald Miller presents a 7-part storytelling framework to clarify what your business offers and why it matters to customers. He effectively becomes your messaging coach, helping you cut through the fluff and communicate in a way that immediately resonates. Marketers often call this an “essential read for refining messaging and connecting with customers in a meaningful way”. The book uses the elements of a good story (characters, problems, heroes, guides) to reshape how you talk about your brand – making the customer the hero and your brand the guide.
Why it’s useful for e-commerce: Online shoppers have short attention spans. If your homepage or Amazon listing doesn’t grab them in seconds with a clear, compelling message, they’ll move on. Building a StoryBrand provides a formula to sharpen your copywriting and web design around a narrative that customers find irresistible. You’ll learn to highlight how your product solves a real problem and makes the customer’s life better (the classic “what’s in it for them”). For example, instead of saying “We sell artisanal coffee,” a StoryBrand approach might lead you to: “Fuel your day with ethically sourced, small-batch coffee that inspires your morning.” Miller’s framework is incredibly practical – many e-commerce brands have revamped their websites, about pages, and even social media bios based on it. The result? Higher engagement and conversion rates, because customers quickly understand why they should choose you. If you feel your marketing materials aren’t clicking with people, this book will be a game-changer in transforming your brand’s narrative.
The world of marketing is always evolving, but the insights from these books are timeless and timely. By reading and applying the lessons from the best marketing books of 2025, you equip yourself with strategies that drive real results. Whether it’s crafting a viral campaign using Berger’s STEPPS framework or streamlining your plan on one page with Allan Dib’s method, each book above offers actionable takeaways for e-commerce brands and Amazon sellers.
The key is to put knowledge into action. Pick one book to start with and commit to implementing at least one idea you learn. For example, after reading The Age of Influence, you might identify 5 micro influencers and launch a trial campaign to generate UGC for your product. Or after finishing StoryBrand, you could rewrite your website’s homepage to sharpen your value proposition. Track the impact – you may be surprised at how quickly these changes can boost engagement or sales.
Remember, marketing success in 2025 isn’t about chasing every new trend blindly. It’s about mastering the fundamentals (consumer psychology, compelling content, clear positioning) and then amplifying them with modern tactics like influencer partnerships or growth hacking. By investing time in these books, you’re effectively gaining mentors in each author. They’ve done the hard work and experiments so you can skip straight to what works.
If you’re an e-commerce brand or Amazon seller, you’ve probably noticed how TikTok went from a quirky video app to a full-fledged social commerce powerhouse almost overnight. What started as a platform for lip-syncing teens has evolved into a marketing juggernaut driving real ROI for businesses. In this post, we’ll explore how TikTok’s rise drives ROI for e-commerce brands in 2026, breaking down its meteoric growth, the power of its algorithm and micro influencers, and what it all means for your brand’s marketing strategy. By the end, you’ll understand TikTok’s history, its current status (and challenges), and how micro influencers, content creators, and authentic UGC on TikTok can boost engagement and sales for online sellers like you.
TikTok’s growth has been nothing short of explosive. Launched internationally in 2017, TikTok hit 1 billion users faster than any social platform before it. For context, TikTok’s website was visited more often than Google last year – a clear sign of its global dominance. The platform’s surge in popularity during the late 2010s (and especially the 2020 pandemic lockdowns) turned it into a household name. Millions of people, stuck at home, started filming 15-second dance challenges, comedic skits, and product hacks. This wave of engagement helped TikTok skyrocket in downloads and active users worldwide. By 2022, over 100 million Americans (about one-third of the U.S. population) were on TikTok, with the average U.S. user watching 80 minutes of TikTok videos per day – more than they spend on Facebook and Instagram combined.
Why did TikTok grow so quickly? A few key factors set TikTok apart:
Together, these factors created a perfect storm of growth. TikTok’s rise wasn’t an accident; it was engineered through savvy tech (that AI-driven feed) and a keen understanding of what entertains people online.
TikTok’s backstory is key to understanding its success. The app’s journey began in two places at once:
ByteDance’s genius move was acquiring musical.ly in November 2017 and merging it with their own platform. In 2018, musical.ly was officially rebranded as TikTok, combining the content libraries and user bases of both apps. Overnight, millions of musical.ly users woke up to a new TikTok logo on their phones. This gave TikTok a ready-made global audience and content ecosystem. By early 2018, TikTok (the international version of Douyin) was the most downloaded iOS app in the world.
From there, TikTok’s expansion went into overdrive:
Today, TikTok (known as Douyin in China) is operated by ByteDance and serves users in over 150 countries. Its journey from a niche lip-sync app to a global social media powerhouse in under a decade is unprecedented. Below is a timeline of key TikTok milestones that shaped its history:
TikTok Timeline:
YearMilestone2016ByteDance launches Douyin in China (the original Chinese version of TikTok), quickly gaining 100M users in 1 year.2017ByteDance acquires U.S.-based musical.ly app for ~$1B and lays groundwork to merge it with TikTok.2018TikTok launches globally (merging musical.ly). The app surges in popularity, becoming the world’s most downloaded iPhone app in Q1.2019TikTok introduces advertising options for brands and rapidly expands its young user base worldwide. Downloads exceed 1 billion.2020Usage explodes during COVID-19 lockdowns. However, governments (like the U.S. and India) raise data security concerns, with India banning TikTok and the U.S. considering a ban.2021TikTok reaches 1+ billion monthly active users globally (achieving in 5 years what took others a decade). U.S. ban threats ease after TikTok explores partnering with Oracle to address data issues.2023TikTok rolls out new features (advanced video editing, AR filters) and expands e-commerce tools (e.g. TikTok Shop) in various markets. The app’s cultural influence continues to grow.2024TikTok Shop (launched late 2023 in the U.S.) propels a surge in social shopping. In Q1 2024 alone, TikTok was downloaded 137 million times worldwide. U.S. users reach an all-time high.

By 2026, TikTok stands as a staple of internet culture and a critical marketing channel – but it’s not without challenges. Let’s look at TikTok’s current status:
In short, TikTok today is a platform of huge opportunities (massive reach and innovative commerce features) tempered by external uncertainties (mainly regulatory risks). For marketers, the key is to leverage TikTok’s influence now, while also diversifying your social strategy in case of any sudden changes.
TikTok’s explosive growth has turned it into a must-watch platform for brands. Short-form videos and viral challenges define TikTok’s appeal, keeping users hooked and businesses eager to join the conversation.
It’s hard to talk about TikTok’s marketing power without mentioning influencers – especially micro influencers. TikTok and influencer marketing are a perfect match that has rewritten the rules for brands. Here’s why TikTok is such fertile ground for influencer campaigns:
It’s worth noting that Stack Influence (our brand) specializes in exactly this kind of campaign – connecting e-commerce brands with vetted micro influencers to generate authentic UGC at scale. By partnering with many micro influencers, brands can flood TikTok (and other channels) with relatable content, amplifying reach while keeping costs reasonable. This approach often beats a single expensive ad or a one-off celebrity post, especially when targeting Gen Z and millennial shoppers who value authenticity.

Peering into the future, what’s next for TikTok – and what does it mean for brands and sellers? Based on current trends, here are some educated predictions for TikTok in the coming year or two:
Bottom line: TikTok’s future looks bright but will not be without hurdles. For e-commerce marketers and Amazon sellers, TikTok will continue to offer creative ways to reach consumers through storytelling and community-driven commerce. The savviest brands will keep experimenting on TikTok – testing new content styles, leveraging rising creators, and using the latest platform tools – to stay ahead of the curve.
TikTok’s journey from lip-syncing app to influencer marketing powerhouse holds valuable lessons for anyone in e-commerce. The platform’s unique blend of massive reach, high engagement, and authentic content has proven it can drive serious ROI for brands. Despite an uncertain regulatory future, TikTok today is an indispensable marketing channel – especially if you target younger, socially savvy consumers.
For e-commerce brands and Amazon sellers, the message is clear: don’t sleep on TikTok. Whether it’s partnering with micro influencers to spark viral moments, encouraging your customers to post UGC reviews, or using TikTok’s shopping features to boost sales, there’s immense upside to riding this wave. A single well-executed TikTok campaign can achieve what months of traditional advertising might not – from skyrocketing your product up Amazon’s rankings to significantly increasing your site traffic.
In 2026, success in online retail will belong to brands that combine great products with savvy social media storytelling. TikTok just happens to be the premier stage for that storytelling right now. So ask yourself: Is your brand taking advantage of TikTok’s rise? If not, now is the time to start. Experiment with a small campaign, learn what resonates with the TikTok community, and scale up. The cost of entry is relatively low – often just the price of a few sample products sent to creators – and the potential rewards (brand awareness, engagement, and yes, revenue) are high.
Social media moves faster than ever in 2026, and what’s trending can make or break a brand’s online success. For e-commerce entrepreneurs and Amazon sellers, keeping up with what are social media trends this year isn’t just buzz – it’s a business imperative. Why? Because roughly two-thirds of the world’s population (over 5 billion people) are now on social platforms, and those platforms heavily influence how consumers discover products and make purchase decisions. In this post, we’ll break down the most important social media trends in 2026 – from viral TikTok videos to the explosion of micro influencers and UGC – and explain how these trends can drive real ROI for your online store.
What you’ll learn: By the end of this guide, you’ll understand the key social media shifts shaping 2026, why they matter for e-commerce brands, and how to leverage each trend (like micro influencers, influencer marketing tactics, new content formats, and more) to grow your business. Let’s dive in!
Staying on top of social media trends isn’t about chasing every viral dance or meme – it’s about staying aligned with consumer behavior. Social platforms have become critical shopping and discovery channels. In fact, social media became the number one customer acquisition source for brands in 2023, driving about 30% of all e-commerce revenue. That means if you’re not active where your customers spend their time (Instagram, TikTok, YouTube, etc.), you’re potentially missing out on a huge chunk of sales.
Trends also signal how algorithms and user preferences are changing. For example, an algorithm update might favor short videos this year, or consumers might suddenly flock to a new platform (remember how quickly TikTok blew up?). E-commerce brands and Amazon sellers who adapt quickly – by creating trending content or embracing new features – gain a competitive edge. On the flip side, ignoring trends can leave your content unseen as organic reach declines and competitors swoop in with fresh, engaging strategies. The bottom line: staying agile with social media trends helps you maintain visibility, engage your audience authentically, and ultimately drive more traffic and sales to your online store.

“Video or it didn’t happen.” That’s the reality on social media now. Short-form video continues to reign supreme in 2026, with platforms like TikTok, Instagram Reels, YouTube Shorts, and Facebook Reels leading the charge. TikTok in particular has exploded – it now boasts over 2 billion total users and is projected to hit 1.8 billion monthly active users by the end of 2026. In other words, a massive chunk of your potential customers are scrolling through bite-sized videos every day.
Why are short videos so powerful? Here are a few key reasons:
How e-commerce brands can leverage this trend: Make short video a staple of your content. Film quick product teasers, before-and-after demos, or “viral style” clips that align with popular challenges. For example, a cosmetics brand might do a 15-second makeover transformation on Reels, or an Amazon seller might film a TikTok of their product solving a common problem in a clever way. Don’t worry about Hollywood-level production – authenticity beats polish on social (more on that later). The key is to post videos consistently. Short-form content tends to have a short lifespan, but the long-term wins come from cumulative reach. Every viral 10-second clip is a chance to drive a burst of traffic to your product page or Amazon listing.
Pro Tip: Repurpose across platforms. A single video can be shared on TikTok, then as an Instagram Reel, a YouTube Short, and even a Pinterest Idea Pin. This maximizes your reach without constantly reinventing the wheel.
Influencer marketing is nothing new – but in 2026, it’s evolving. Brands are shifting focus from mega-celebrities to micro influencers (creators with tens of thousands of followers or less) and even nano influencers (just a few thousand followers). Why the pivot? Because bigger isn’t always better when it comes to influence. These smaller-scale creators often deliver higher engagement, deeper trust, and better ROI than their superstar counterparts.
Micro influencers may not have millions of fans, but they have passionate niche audiences who actually listen to their recommendations. For example, a micro influencer with 20k followers focused on vegan skincare will likely drive more conversions for a vegan soap brand than a celebrity with 5 million generic followers. In fact, studies show micro and nano influencers achieve engagement rates in the 5–20% range, leaving macro influencers’ typical 1–3% engagement in the dust. Their followers see them as genuine experts or “friends,” so their word carries weight.
Critically for e-commerce brands, micro influencers are budget-friendly. Instead of paying one big influencer $20,000 for a single post, that same budget could partner with 20+ micro influencers, each creating content and buzz in their community. This isn’t just theory – data shows micro-level campaigns can yield around a 20:1 return on investment, versus roughly 6:1 ROI for macro-influencer campaigns. In other words, $1 spent on micro influencer collaborations can drive $20 in revenue on average, making it an extremely cost-effective marketing channel.
To summarize the Micro vs. Macro Influencer debate, check out the comparison below:
Metric
Micro-Influencers (e.g. 5k–50k followers)
Macro-Influencers (e.g. 500k+ followers)
Engagement Rate
~5%–20% (highly engaged niche audience)
~1%–3% (much lower average engagement)
Audience Trust
Very high – seen as authentic peers/friends
Lower – audience is aware of sponsorships
Cost per Post
$100–$500 (affordable for small brands)
$5,000+ (can be $10k–$20k+ for one post)
ROI Potential
~20:1 ROI (outstanding, via many small creators)
~6:1 ROI (good, but lower efficiency)
Content Volume
Multiple unique posts from several creators
Typically one or few posts from one creator
Best For
Niche targeting, authentic product reviews, UGC-style content
Mass awareness campaigns, broad reach hits
Why this trend matters: For Amazon sellers and DTC brands, micro influencers have become secret weapons. They excel at creating authentic review videos, unboxing clips, and tutorial posts that build trust around your product. Many are willing to work in exchange for a free product or a modest fee, which is incredibly cost-effective if you’re on a tight marketing budget. Plus, you can scale up – imagine dozens of micro influencers each posting about your product to their tight-knit communities, creating a ripple effect of awareness. This kind of grassroots buzz can directly translate into sales bumps on Amazon or your website (some campaigns even see a noticeable boost on Amazon rankings after a flurry of micro influencer reviews).
Tips to leverage micro influencers: Start by finding creators whose niche aligns with your product category (for example, a fitness gear brand might find micro influencers who post home workout videos). Reach out with a personal message and offer free product for content, or negotiate a small per-post rate. Ensure you give them creative freedom – the content should feel like a genuine testimonial, not a scripted ad. You can use platforms like Stack Influence to streamline this process, connecting your e-commerce brand with vetted micro and nano influencers at scale. Over time, consider building longer-term relationships with high performers; ongoing ambassadorships tend to yield even better results than one-off posts in 2026’s influencer landscape.
In an era of polished ads and sponsored posts, consumers have made one thing clear: authenticity wins. That’s why user-generated content (UGC) – posts, photos, and videos created by real users or customers – is gold for marketing in 2026. Shoppers trust content that feels genuine and community-driven far more than traditional brand advertising. One survey found 92% of consumers trust peer recommendations and reviews more than ads. It’s no surprise, then, that UGC is 2.4x more authentic to people than brand-created content (in one study) and significantly sways buying decisions.
For e-commerce brands, leveraging UGC can directly boost the bottom line. How? Consider these compelling stats: User-generated content is 20% more influential than any other media type in driving Millennials’ purchase decisions, and adding UGC (like customer photos or reviews) to product pages can increase conversions by up to 161%. That’s an enormous lift from simply showcasing real customers using or endorsing your product. When potential buyers see others – people who look like them – happily using an item, it builds trust and FOMO. In essence, UGC provides the social proof that turns browsers into buyers.
Key forms of UGC in 2026:
Remember, authenticity is the currency here. Modern consumers, especially Gen Z, can sniff out inauthentic or overly “salesy” content in seconds. That means even when working with influencers, brands are now favoring a more unfiltered style. Raw, unpolished content (think TikTok’s casual vibes or Instagram Stories shot on a phone) often outperforms meticulously edited commercials. We’re even seeing the rise of “UGC creators” – individuals who might not be famous influencers, but are skilled at creating relatable content that brands can repurpose. In 2026, some e-commerce companies are hiring these everyday creators to produce TikTok-style videos or lifestyle photos featuring their products, precisely because the result looks and feels like genuine user content rather than an ad.
Stack Influence Insight: An interesting development is that UGC creators are becoming the new influencers in a way. Brands are increasingly collaborating with micro content creators who produce realistic, customer-perspective content for use in ads or social media. This approach blends influencer marketing with UGC – delivering authentic-looking promotions that audiences appreciate.
Action step: Make UGC and authenticity a core part of your strategy. Share customer stories, showcase real-life usage of your products, and encourage dialogue. Whether it’s featuring a buyer’s unboxing video, reposting a fan’s tweet about your service, or going live in a casual Q&A, these authentic touches humanize your brand. E-commerce is no longer just transactional; it’s community-driven. If potential customers see a lively community around your product – genuine reviews, tagged posts, active comments – they’ll be far more inclined to trust and buy from you.

In 2026, social media isn’t just for browsing – it’s for buying. The line between social networks and shopping platforms has all but dissolved, giving rise to the term “social commerce.” Simply put, social commerce means customers can discover a product and purchase it right within a social app, without being redirected elsewhere. This trend has been accelerating rapidly. Globally, social commerce sales jumped to an estimated $700+ billion in 2024, comprising about 19% of all e-commerce – up from only 9.7% in 2020. In certain regions (looking at you, China and Southeast Asia), buying through social platforms has practically become second nature.
Major platforms are continually rolling out new shopping features:
For e-commerce brands and Amazon sellers, social commerce represents a massive opportunity. It reduces friction in the customer journey – users can go from inspiration to purchase in seconds. Imagine a customer scrolling Instagram, seeing a micro influencer’s post about a skincare product, and being able to tap “View Product” and checkout instantly. Fewer clicks = higher conversion rates. It’s no wonder 49% of brands planned to increase social commerce investment heading into 2024, and that number is likely even higher in 2026.
Even if you primarily sell on marketplaces like Amazon, you can still capitalize on social commerce trends. How? Use social media as a top-of-funnel to drive people to your listings. For example, leverage the Amazon Influencer Program, where influencers showcase Amazon products in their content with affiliate storefront links. When their followers buy, the influencer earns commission and you get the sale. Many Amazon sellers are teaming up with TikTok creators who do “Amazon finds” or unboxing videos of trending Amazon products. A single TikTok video going viral can send thousands of new customers to an Amazon product page in a day.
Another approach is live commerce. In the U.S., Amazon Live is a platform where influencers host live video streams demonstrating products (much like a modern QVC), and viewers can buy the featured items on Amazon in real time. Meanwhile on Instagram or TikTok, brands or influencers can host live sessions trying products, answering questions, and dropping exclusive discount codes to viewers. This merges entertainment with instant shopping – often dubbed “shoppertainment.” It’s interactive, engaging, and can create urgency (e.g., “Only 10 left in stock – grab yours now!” during a live stream).
To ride the social commerce wave: Ensure your products are set up for in-app shopping where possible. If you have your own website, use tools like Facebook Shops or Instagram Shopping to sync your product catalog to your social profiles. This way, your posts become purchasable pins and videos. If you’re on platforms like Shopify, it’s usually a quick integration. Also, continue to produce content tailored for discovery – use relevant hashtags, catchy visuals, and platform-specific trends to get your products on people’s feeds. Social commerce is as much about being found as making the sale seamless. The more you can make your product the star of that endless social feed, the more you’ll benefit from this trend.
Here’s a refreshing trend: Brands are shifting from chasing sheer follower counts to building engaged communities. With social media maturing, it’s clear that having 1,000 highly engaged followers is far more valuable than 100,000 passive ones. In 2026, we see a rise of private groups, niche communities, and two-way interactions as a core strategy for sustained social media success.
What’s driving this? Partly “social media fatigue.” Users are increasingly selective about what content they engage with. They crave genuine connection and value, not just endless broadcast-style ads. As a result, savvy brands are creating exclusive spaces where their audience can interact in a more personal way. For example:
The focus here is quality of engagement. In a private community, members feel heard and valued. They’re more likely to provide feedback, advocate for your brand, and ultimately become repeat customers. It fosters loyalty. And from the brand perspective, these communities are gold mines for insights and user-generated content. You can observe what your most passionate customers are saying, ask them for opinions (before launching a new product, for example), and even recruit some as brand ambassadors or beta testers.
For e-commerce and Amazon sellers, community-building can also help mitigate the ups and downs of algorithms. While your reach on public social feeds might ebb and flow (thanks to algorithm changes), a community group ensures you have a direct line to your core audience. When you have a big announcement or sale, you can share it in your group and know your most interested fans will see it and amplify it.
How to cultivate community: Start by interacting more deeply with your audience. Respond to comments on your posts (not just with “thanks!” but with meaningful replies), ask questions, run polls or Q&As on Stories, and show the human side of your brand. You might introduce a weekly discussion topic or a live chat session. If you have the bandwidth, launch a dedicated group or forum as mentioned above – but be sure to moderate it and keep it lively (a dead, spam-filled group can hurt more than help). Highlight user contributions: shout out a “fan of the week” or share user-submitted content. When people feel like they’re part of something, they stick around. Over time, this tight-knit community becomes your brand’s advocacy army, organically spreading the word and defending you against competitors. It’s a long-term play with compounding returns.
No discussion of 2026 trends is complete without mentioning artificial intelligence (AI). AI has swiftly woven itself into the fabric of social media marketing – from content creation to customer service. For e-commerce brands with limited time and resources, AI can be a game-changer, helping you keep up with the 24/7 demands of social without burning out.
How AI is being used in social marketing:
The overarching trend is that AI is becoming a “permanent part of the social landscape” – not a buzzword but a practical toolkit. Importantly, the human touch still matters (nobody wants a feed that feels like it’s run by robots), but smart marketers use AI to augment their capabilities. For example, you might use an AI tool to generate 5 variations of a headline for your new product announcement tweet, then pick the catchiest one. Or use scheduling software with AI that suggests optimal posting times based on when your followers are most active.
Even content strategy can benefit: AI can analyze past post performance and help predict what topics or formats your audience will engage with next. Imagine knowing that your followers are suddenly talking about a new TikTok filter or a pop culture event – you could create a relevant post today to ride the wave, courtesy of an AI alert.
Keep it ethical & transparent: One emerging best practice is being transparent when appropriate about AI usage. Audiences appreciate honesty. For instance, some brands openly share behind-the-scenes like, “We used AI to help brainstorm this campaign concept!” – which can actually boost engagement as it’s a hot topic and shows you’re innovating. Just ensure AI isn’t creating tone-deaf or inaccurate content; always have a human in the loop to review and maintain your brand voice.
In summary, AI can give e-commerce marketers superpowers – letting you do more with less and make data-driven decisions quickly. By embracing automation for routine tasks and insights, you free up time to focus on creativity and strategy, which no algorithm can replace. As we head further into 2026, the brands effectively blending human creativity with AI efficiency will be the ones leading the pack on social media.
As we’ve seen, going faceless on YouTube is not a limitation – it’s a creative choice. Whether you animate an entire world from behind your screen, speak knowledge into a microphone over visuals, or quietly film your hands crafting a masterpiece, you can grow a thriving channel in 2026 without ever showing your face. In many ways, faceless content allows your ideas, skills, and creativity to shine brighter than ever.
Imagine building a loyal audience that values you for your knowledge, humor, or artistic flair alone. It’s absolutely possible. There are faceless channels today with millions of subscribers – from calming music streams to educational powerhouses – proving that content truly is king. Even brands have embraced faceless creators, offering sponsorships and collaborations to channels that align with their products and values. As the creator economy expands (projected to reach nearly half a trillion dollars by 2027), there’s ample room for micro influencers who never step in front of a camera. The key is to deliver value and be consistent. You might start as a faceless creator out of comfort, but you can end up an influencer in your niche thanks to the quality of your content.
So, what are you waiting for? Pick an idea from this list that excites you and give it a try. Maybe you’ll start that cozy faceless book-review channel, or launch a new series of animated tech explainers. The beauty of YouTube is you can iterate and improve as you go – all without the pressure of perfect lighting on your face. By focusing on content and community, you can build an authentic brand that viewers trust and love.
Now it’s your turn: Turn on that microphone or camera (pointed at anything but you) and start creating! With these faceless YouTube channel ideas, you have a head start on a format that fits your style. Stay consistent, engage with your audience, and don’t be afraid to promote your work (on social media or via platforms like Stack Influence when you’re ready to monetize). You’ll quickly realize that you don’t need to show your face to make a real impact. Here’s to your faceless YouTube success in 2026 – now go share your passion with the world!
You don’t need to be on-camera to build a YouTube empire. In fact, faceless YouTube channels are booming. On TikTok, over 200,000 posts tagged #Faceless have amassed 1.1 billion views, proving the massive audience appetite for content that doesn’t rely on a personality’s face. 2026 is the year content creators – from newcomers to seasoned micro influencers – are doubling down on creative no-camera formats to grow their channels. In this guide, we’ll explore Faceless YouTube Channel Ideas for 2026 that can spark your creativity and help you thrive without ever stepping in front of a camera. You’ll learn why faceless channels are trending, discover a variety of video formats (animation, voiceover, screen share, ambient videos, etc.), get practical tips and tool suggestions, and see how even micro influencers leverage these ideas for influencer marketing success. Let’s dive in!

Going faceless on YouTube comes with unique benefits and is quickly becoming a mainstream strategy for creators. Here’s why faceless channels are thriving in 2026:
In short, going faceless lets you create on your own terms. You can protect your privacy, emphasize substance over style, and tap into influencer marketing opportunities without a personal brand persona. Now, let’s look at exactly what types of faceless content are working on YouTube in 2026.
Faceless content is not one-size-fits-all – there are many formats to choose from. Below is a quick comparison of popular faceless YouTube video formats and what they involve. These ideas require no on-camera presence, just creativity and consistency:
Faceless Video FormatWhat It InvolvesExamples / TipsAnimated ExplainersCartoons or motion graphics tell a story or explain a concept, with narration.Educational stories (e.g. science, history) using tools like Animaker or Adobe After Effects.Voiceover & B-Roll VideosNarration over stock footage, images, or slides – no presenter on screen.Listicles (Top 10 videos), documentary-style explainers, or product reviews showing the item up close. Use a good mic for audio clarity.Screen RecordingsCapturing your screen while you do something, often with a voiceover guide.Tutorials (software how-tos, coding sessions) or gameplay with commentary. Use tools like OBS for recording.Ambient/Background ContentRelaxing visuals with music or natural sounds; minimal or no narration.Lo-fi music mixes, nature soundscapes, meditation guides with on-screen text. Great for long watch times – ensure audio loops smoothly.Hands-On DemonstrationsShow hands or over-the-shoulder perspective performing tasks, not your face.Cooking recipes, DIY crafts, art tutorials, unboxings. Focus camera on the activity; you can voiceover or use captions to explain steps.
These formats illustrate that faceless videos can be just as engaging as face-camera vlogs. Now, let’s dive deeper into each category with detailed inspiration and tips:
Animated explainer channels like Kurzgesagt captivate audiences with colorful visuals and clear narration – all without any presenter on screen.
Animation is a powerful way to deliver information or stories on YouTube while remaining faceless. In this format, you create or compile visuals – cartoons, motion graphics, whiteboard drawings, or even simple slide presentations – and pair them with a voiceover or text to tell a narrative. Some successful faceless channels use full 2D/3D animation to explain science, history, or fictional stories in an entertaining way. Others use simpler illustrated styles (think infographic animations or whiteboard sketches) to break down complex ideas.
You’ve probably watched a Top 10 countdown or a documentary-style video on YouTube where you never see a host – that’s the classic voiceover format. Here, you script out a narrative and then record a voiceover (or use a narrators’ service or AI voice) while showing relevant visuals: stock footage, images, charts, or subtitled quotes. It’s a proven faceless formula on YouTube, popular for everything from travel listicles to tech product reviews.
If you have expertise in something on the computer – coding, graphic design, digital marketing, video editing, gaming, you name it – a screen recording channel might be your perfect faceless format. Here, you capture your screen as you perform tasks or demonstrate software, and usually add voiceover explanation. The viewer essentially looks over your shoulder virtually, learning or being entertained by what’s happening on-screen.
Not all videos need talking. In fact, some of the most popular faceless YouTube channels are those that provide ambient or relaxing content – think of them as digital escape portals. These include nature soundscapes, study music streams, meditation guides, ASMR (Autonomous Sensory Meridian Response) videos, and more. The common thread: they create a mood or experience for the viewer/listener, with little to no on-screen presence of the creator.
Faceless cooking videos often focus on the food prep close-up, letting viewers practically taste the recipe without ever seeing the chef.
Who says you need a face to build a personal connection? Hands-only videos – where you film your hands performing a task – can be incredibly engaging. Viewers love point-of-view tutorials because they can easily imagine themselves doing the activity. This format is popular for cooking channels, DIY crafts, art and calligraphy, woodworking, makeup (focusing on the makeup process rather than the vlogger’s face), and more. Essentially, the camera becomes the eyes of the audience.
As we’ve seen, going faceless on YouTube is not a limitation – it’s a creative choice. Whether you animate an entire world from behind your screen, speak knowledge into a microphone over visuals, or quietly film your hands crafting a masterpiece, you can grow a thriving channel in 2026 without ever showing your face. In many ways, faceless content allows your ideas, skills, and creativity to shine brighter than ever.
Imagine building a loyal audience that values you for your knowledge, humor, or artistic flair alone. It’s absolutely possible. There are faceless channels today with millions of subscribers – from calming music streams to educational powerhouses – proving that content truly is king. Even brands have embraced faceless creators, offering sponsorships and collaborations to channels that align with their products and values. As the creator economy expands (projected to reach nearly half a trillion dollars by 2027), there’s ample room for micro influencers who never step in front of a camera. The key is to deliver value and be consistent. You might start as a faceless creator out of comfort, but you can end up an influencer in your niche thanks to the quality of your content.
So, what are you waiting for? Pick an idea from this list that excites you and give it a try. Maybe you’ll start that cozy faceless book-review channel, or launch a new series of animated tech explainers. The beauty of YouTube is you can iterate and improve as you go – all without the pressure of perfect lighting on your face. By focusing on content and community, you can build an authentic brand that viewers trust and love.
Now it’s your turn: Turn on that microphone or camera (pointed at anything but you) and start creating! With these faceless YouTube channel ideas, you have a head start on a format that fits your style. Stay consistent, engage with your audience, and don’t be afraid to promote your work (on social media or via platforms like Stack Influence when you’re ready to monetize). You’ll quickly realize that you don’t need to show your face to make a real impact. Here’s to your faceless YouTube success in 2026 – now go share your passion with the world!
Imagine your micro influencer campaign’s posts suddenly stop reaching anyone new – no warnings, no obvious reason. You might be experiencing shadow banning. Shadow banning is when a social platform quietly suppresses your content’s visibility without telling you. Your account and posts remain technically active, but very few people (beyond maybe your own followers) can see or discover your content. In effect, it can feel like your posts are getting swallowed by a void. This opaque practice is very real – in fact, a recent survey of 1,006 social media users found about 9.2% believed they had been shadow banned at some point. Major platforms like Instagram, TikTok, Facebook, and others have users reporting this issue, even if the platforms don’t always admit it.
Platforms often avoid using the term “shadow ban” officially (Instagram’s CEO has even claimed shadowbanning “doesn’t exist” in the way users think). Instead, they talk about “recommendability” – content that violates guidelines simply isn’t recommended to others. But from a creator’s perspective, the effect is the same: posts don’t show up where they should, and reach plummets. For content creators and brands, especially those in influencer marketing, understanding shadow banning is critical. It’s one of the trickiest challenges in social media marketing in 2026, with algorithmic content suppression capable of significantly impacting your digital marketing efforts.
For direct-to-consumer e-commerce brands, Amazon sellers, and influencers alike, visibility is everything. When your social content quietly gets throttled, it can derail your marketing goals. A sudden drop in impressions or engagement can lead to:
In the world of influencer marketing, these hidden penalties hurt both the creator and the brand. An e-commerce brand’s campaign can suffer if an influencer’s audience can’t see the posts. Even the most authentic content or UGC won’t deliver results if it’s quietly buried by the platform. (This is why many brands work closely with their influencers – or use platforms like Stack Influence – to monitor engagement and catch any unusual drops early.) Simply put, shadow banning can translate to lower ROI for your marketing efforts, making it a serious concern for anyone relying on social media exposure.

One of the toughest parts of shadow banning is that platforms don’t notify you when it happens. There’s no pop-up that says “You’ve been shadow banned!” You have to play detective. Here are some tell-tale signs:
Trust your instincts – if multiple signals point to a visibility drop that you can’t otherwise explain, you could be dealing with a shadow ban. To be sure, examine how your content behaves outside of your own account’s view.
Each social network handles shadow banning a bit differently. Here’s how it tends to play out on major platforms in 2026:
PlatformPossible Shadow Ban IndicatorsTikTokVideos stop appearing on the For You Page, and no longer show up under the hashtags you’ve used. This leads to a sudden drop in views and new likes/comments. Content might only be seen by your existing followers.InstagramPosts don’t show up in hashtag feeds or on the Explore page. Even some followers might not see your posts in their home feed. Instagram doesn’t officially “shadow ban,” but if your account isn’t “recommendable” (e.g. due to guideline flags), your content won’t reach beyond your followers.YouTubeYouTube won’t call it a shadow ban, but videos covering sensitive or controversial topics can be quietly de-prioritized. They won’t be suggested to viewers, won’t appear prominently in search, and see much lower impressions. No notification is given to the creator.X (Twitter)Tweets may be hidden from search results and trending pages. Non-followers might not see your replies or tweets at all. Your content essentially stays in your followers’ timelines only, limiting growth.FacebookA shadow ban can look like an extreme reach drop. Your posts no longer show up in followers’ News Feeds or in group feeds. They may also be omitted from Facebook search results, making it hard for anyone new to find your content.LinkedInPosts stop appearing as “suggested” content to others. Engagement from outside your immediate network dies down. In some cases, even people searching your name might not see your posts or profile in results.
Table: Common signs of shadow banning across popular social platforms. Each platform’s algorithm has its quirks, but the common thread is reduced visibility. If you notice these patterns, you’ll want to investigate further.
What triggers a shadow ban? It’s not always straightforward – platforms use automated systems to flag behavior, and they rarely tell you exactly what went wrong. However, several common causes have been identified by experts and creators:
It’s important to note that shadow banning isn’t always a personal reprimand – often it’s just the platform’s AI trying to reduce spam or harmful content at scale. Unfortunately, that means well-intentioned creators can get caught in the crossfire. The algorithms aren’t perfect. For example, a perfectly normal post could be mistaken for bots or spam, or a photographer’s image could trip a nudity filter by accident. The process is opaque, which is why creators need to be vigilant.
There’s no magic switch to guarantee you’ll never be shadow banned, but you can greatly reduce your risk. Consistently follow best practices on each platform. Here are some proven tips to help avoid a shadow ban:
By following these steps, you drastically reduce the chances of getting shadow banned. Essentially, think from the platform’s perspective: they want genuine, engaging content and normal user behavior. If you deliver that, you’re unlikely to get “ghosted” by the algorithm.
What if it’s too late and you suspect you have been shadow banned? Don’t panic – most shadow bans are temporary, usually lasting only a few days to a couple of weeks. You can take action to bounce back faster and signal to the platform that you’re in compliance. Here’s a recovery game plan:
Recovering from a shadow ban can be frustrating, but patience and consistency are key. Many creators report being back to normal after a week or two of diligent cleanup and compliant activity. The good news is that shadow bans aren’t permanent – you can get your visibility back. Just use it as a learning experience to refine your content strategy moving forward.
Shadow banning on Instagram, TikTok, or any social platform in 2026 remains a quiet threat to social media marketers. It’s like being penalized by an invisible referee – you might not even realize it until your metrics nosedive. For e-commerce brands and Amazon sellers, this can mean lost sales and wasted marketing spend if your influencer posts aren’t reaching customers. The key takeaway is that prevention is far better than cure. By staying within guidelines, avoiding spammy tactics, and monitoring your engagement closely, you can largely steer clear of shadow bans.
For those working with micro influencers and content creators, communication is crucial: ensure they understand what triggers a shadow ban so your campaign isn’t inadvertently sabotaged. And if you do encounter a sudden drop in reach, now you have a roadmap to diagnose and address it. In the fast-paced world of social media algorithms, being proactive and informed is your best defense. Keep creating authentic, high-quality content, engage genuinely with your audience, and you’ll continue to build your brand’s presence – algorithms notwithstanding.
TikTok built its empire on snappy short-form videos – but in a surprising twist, static image posts are making a comeback on the platform. In fact, TikTok’s Photo Post Comeback: Why Images Outperform Videos is becoming a hot topic among marketers. Recent data shows that photo carousels (a series of swipable images) can generate higher engagement than traditional videos. This is eye-opening news for e-commerce brands, Amazon sellers, and content creators who’ve been laser-focused on video content. If you’ve assumed that videos are the only way to win on TikTok, it’s time to reconsider – images are staging an unexpected resurgence.
In this article, we’ll break down why TikTok’s photo post format is outperforming videos and what this trend means for brands. You’ll learn what’s driving the surge in image-based content, see the numbers behind the trend, and get tips to harness it for your own marketing. From micro influencers creating quick photo content to user-generated images (UGC) fueling authentic posts, we’ll explore how influencer marketing is evolving on TikTok’s newest stage. Let’s dive in and see why a single picture (or a carousel of them) could be worth a thousand videos for your social strategy.
It might sound ironic – TikTok, the video platform, now encouraging photo posts – but that’s exactly what’s happening. In late 2022, TikTok introduced “Photo Mode,” allowing users to share carousel posts of still images with music. Fast forward to 2024–2025: TikTok has doubled down on photos, even launching a new Explore feed featuring only image posts. The platform recently added features like alt text for images, signaling that it’s investing heavily in this format. TikTok’s motivation is clear: static content is in demand again, and they don’t want Instagram (or other apps) to have all the fun. As digital marketing expert Lia Haberman notes, TikTok is aiming to be “all things to all people” – recognizing not everyone wants to make videos, and that there’s a lower barrier to entry for photo posts since users are so accustomed to sharing images.
The performance numbers back up this photo post comeback. According to a 2025 data analysis, TikTok carousel posts (multi-image slideshows) achieve about 3% higher reach on average than video posts – essentially reaching a similar audience size. But the real shocker is engagement: those photo posts generated 81% more engagements and 82% more likes than videos on TikTok. In other words, TikTok images are not just holding their own – they’re often crushing videos in terms of interaction. TikTok’s own team has bragged about this trend to creators, saying carousel photo posts get “2.9× more comments” and “1.9× more likes” compared to videos. Even shares, which videos traditionally led in, are starting to even out. One brand reported that its TikTok photo posts see 11% higher reach and higher average views than its video content. Clearly, images aren’t second-class content on TikTok anymore – they’re driving serious engagement and reach.
To put these differences in perspective, here’s a quick comparison of TikTok photo posts vs. video posts by key metrics:
Metric (avg. performance)
Photo Posts (Carousels)
Video Posts
Reach (audience reached)
~3% higher reach than videos
Baseline (100%)
Engagements (likes, comments)
~81% higher engagement rate
100% (baseline)
Likes per post
~82% more likes than videos
100% (baseline)
Shares per post
~33% fewer shares than videos
100% (baseline)
As the table shows, TikTok photo posts match or beat videos in most areas – slightly higher reach and dramatically higher likes and overall interactions. The only category where videos still led was shares (people tend to share traditional videos a bit more). But in terms of inspiring viewers to like, comment, and engage, images have taken the lead on TikTok. This echoes a broader social media trend: even on Instagram, static images now see higher engagement rates (6.2%) than Reels videos (3.5%). It seems “old school” visual content is cool again.
So why are images outperforming videos on TikTok all of a sudden? Several factors are at play, from algorithm shifts to user behavior. Let’s unpack the reasons behind this unexpected twist.

Multiple trends converged to give rise to TikTok’s photo post comeback. Below are the key factors explaining why images are excelling over videos on the platform:
By understanding these factors, it’s clear why images are thriving on TikTok right now. Photo posts spark more conversations, are easier to churn out, get a helpful boost from TikTok, and enable creative storytelling that viewers love. This is great news for brands and creators who can capitalize on the trend. Next, let’s look at what this all means for e-commerce businesses – and how you can leverage TikTok’s photo post resurgence to drive results.
For e-commerce brands and Amazon sellers, TikTok’s swing toward image content presents a golden opportunity. Many sellers have already mastered visuals on Instagram or their product pages – now they can bring those rich images to TikTok’s massive audience. Here are some ways this trend can benefit brands in the online retail space:
In short, TikTok’s renewed love for images empowers online sellers to diversify their content. You can maintain a vibrant TikTok presence without solely depending on viral videos or pricey production. By blending photo posts into your strategy, you’ll not only keep pace with the platform’s trends but also unlock new creative angles to showcase your offerings. The result can be higher engagement (more likes, comments, and saves on your posts) and ultimately more traffic to your store. For Amazon sellers, this might mean more product detail page visits or even direct sales if you link your TikTok bio to your Amazon listings. For DTC brands, it can mean building community and brand storytelling in a fresh format. And remember, this isn’t an either/or scenario – videos still matter, but now you have a powerful new format in your toolkit.
Ready to ride the wave? Here are some best practices to help ensure your TikTok photo posts truly shine.

Making a great TikTok image carousel is part art and part science. Here are some tips and strategies (gleaned from TikTok’s own recommendations and successful creators) to help your photo posts outperform:
Following these best practices will help ensure your TikTok photo posts hit the mark. Many of them boil down to a core principle: deliver value and intrigue on each slide – whether that’s valuable info, humor, or eye-catching visuals – and guide the viewer to engage. If you do that, your images can achieve the kind of reach and impact on TikTok that marketers used to expect only from videos.
TikTok’s photo post comeback proves that sometimes, what’s old is new again. The platform may have started with dances and skits, but in 2025, images are holding their own – and often outperforming videos in the battle for attention. For brands and creators, this is a refreshing reminder that diversifying your content pays off. By embracing static images and carousels alongside your videos, you can capture engagement from audiences in new ways and stay ahead of shifting social media trends.
For e-commerce entrepreneurs and Amazon sellers, the takeaway is clear: don’t ignore TikTok’s photo format. It’s a low-cost, high-impact addition to your marketing strategy. Leverage those product photos, encourage UGC from customers, and collaborate with micro influencers to create a stream of authentic image posts. You might be surprised at how much ROI a simple slideshow can deliver – whether it’s driving more traffic to your Amazon listings or boosting your brand’s follower count and community interaction.
As TikTok continues to evolve, one thing remains constant: engaging content wins. Right now, that content might just be a carousel of compelling images. So go ahead and experiment with your own photo posts on TikTok – test out new ideas, measure the engagement, and iterate. TikTok’s photo post comeback is your chance to catch a trending wave early and connect with your audience in a fresh format. Jump on it, and watch those likes, comments, and shares roll in. After all, in the fast-moving world of social media, the brands that thrive are the ones that adapt and innovate. Images on TikTok are trending up – and now is the perfect time to leverage that momentum for your e-commerce success.
In 2025, influencer marketing isn’t just about buzz – it’s a full-funnel strategy taking customers from first click to checkout. Micro influencers and content creators are guiding shoppers at every stage, providing authentic user-generated content (UGC) that builds trust and boosts conversions. It’s a game-changer for e-commerce brands and Amazon sellers. In this guide, we’ll explore Full-Funnel Influence: From Awareness to Conversion in 2025 – what it means, why it matters, and how to leverage it. By the end, you’ll see how a holistic influencer marketing approach can drive more traffic, engagement, and sales for your online business.

Influencers are no longer just top-of-funnel promoters – they’re now integral across the entire customer journey, from awareness through conversion. Brands are responding accordingly: 86% of marketers plan to maintain or increase their influencer budgets into 2025, recognizing that creators can deliver impact at every stage. The reason is simple – influencer content isn’t just generating likes; it’s driving real ROI. Nearly eight in ten consumers trust influencer recommendations, and 61% have made a purchase based on an influencer’s recommendation in the past six months. In other words, influencers aren’t just creating hype; they’re converting followers into customers.
Micro influencers (those with smaller but highly engaged followings) play a special role here. Their authentic, relatable style often resonates more deeply than macro-celebrities. In fact, consumers are 60% more likely to trust creators who feel relatable and authentic, and micro-level creators typically deliver 2.4–6.7× higher engagement rates than big-name influencers. This higher engagement and trust translate into greater influence over decisions – exactly what a full-funnel approach aims to harness. Instead of one-off influencer posts that fade, brands in 2025 are fostering ongoing creator partnerships that guide the audience from first discovery all the way to purchase and beyond.
At the top of the funnel (Awareness), the goal is to put your brand on the radar of potential customers. Influencers excel at this. A well-chosen creator can introduce your product to tens of thousands of people who’d otherwise never encounter your brand. Whether it’s a TikTok unboxing, an Instagram reel, or a YouTube mention, influencer content at this stage is all about reach and first impressions.
Importantly, these impressions are highly effective for discovery. TikTok in particular has become a product discovery engine – as much as 78% of TikTok users say they’ve discovered products through influencer videos on the platform. And it’s not just TikTok: globally, 60% of consumers use influencer-curated posts or shopping pages to find new products. For e-commerce brands, this means influencer collaborations can cast a much wider net than your own ads or site alone.
Awareness tactics with influencers include:
Key metrics at this stage are reach, views, impressions, and engagement volume (likes, shares, comments). The focus is on brand awareness – making as many relevant people as possible aware of your product or store. For example, an Amazon seller launching a new product might send samples to 50 micro influencers on Instagram and TikTok. The resulting buzz (stories, unboxing videos, hashtag mentions) can drive a surge of traffic to the Amazon listing, kicking off the awareness wave that every new product needs.
Awareness is only step one. After sparking interest, you need to nurture it. In the consideration stage, potential customers are evaluating your product, comparing alternatives, and deciding if they trust your brand. Here, influencers act as educators and trust-builders – turning initial curiosity into genuine interest. The key is authentic, informative content that speaks to the audience’s questions and pain points.
Creators are uniquely effective at this mid-funnel stage because of the trust they’ve earned with their followers. Globally, 79% of consumers say they trust influencer recommendations when considering a purchase. Often, these recommendations come in the form of longer-form or detailed content such as YouTube reviews, tutorial videos, blog posts, or Instagram Stories explaining the product in use. This is where micro influencers shine: their niche focus and personal tone make their advice feel like it’s coming from a friend. Indeed, surveys show consumers trust “people like me” far more than polished brand content – 84% of people trust peer recommendations over brand-produced ads.
Consideration-stage influencer tactics include:
During consideration, engagement quality is a key metric. Look at comments (are people asking questions, tagging friends?), video watch time, saves, and click-throughs to your website or Amazon page. These indicate that viewers are not just seeing your product, but actively weighing it. For instance, if an influencer’s tutorial video leads to many swipe-ups or link clicks to “learn more” on your site, that’s a strong sign of interest generated.
Keep in mind that authenticity is the currency at this stage. Brands that allow creators creative freedom tend to get more sincere, compelling content. As one study noted, 60% of consumers are more likely to trust creators who seem relatable and honest about their experience. A micro influencer might mention a minor drawback of the product along with its benefits – that honesty can paradoxically increase trust, making their audience more confident that the recommendation is real and worth acting on.
Now for the bottom of the funnel – the conversion stage, where the goal is to drive the audience to take action and buy. This is where influencer marketing efforts translate into measurable sales. By this stage, your target customer knows about your brand (thanks to awareness efforts) and trusts that your product is a good choice (thanks to consideration content). The final push is giving them a convenient, compelling reason to purchase now. Influencers can provide that push through timely calls-to-action, exclusive offers, and seamless shopping experiences.
Several trends in 2025 make converting with influencers more effective than ever:
Conversion-stage tactics to deploy with influencers:
At the conversion stage, sales metrics take center stage: referral traffic that converts, number of orders using the influencer’s code/link, conversion rate, revenue generated, and CPA for influencer-driven customers. If you’re an e-commerce brand, you might track how many new customers each influencer brings in and how that compares to the cost of the campaign. The good news is that, when done right, influencer marketing can have a very attractive ROI. By treating creator content as a sales asset (boosting it, repurposing it, and tracking it), savvy brands turn influencer partnerships into a reliable revenue driver. In fact, companies that once viewed influencers only for awareness are now seeing them deliver “full-funnel” results – conversions included – and are doubling down on these strategies.

Your most authentic influencers might actually be your happy customers. After a purchase, brands can encourage buyers to share their experience on social media, effectively turning them into micro influencers as well. This user-generated content amplifies positive reviews and fuels a virtuous cycle of trust. Remember, people trust people – 84% of consumers trust peer recommendations more than branded content. When new potential buyers see real customers posting about a product, it provides powerful social proof that reduces doubt and encourages them to join in.
Ways to cultivate advocacy and UGC include:
The impact of advocacy is measured in metrics like customer lifetime value, repeat purchase rate, and volume of referral traffic or content. It’s harder to quantify than early-funnel metrics, but extremely valuable – a strong cadre of brand advocates reduces your reliance on paid advertising over time. Essentially, loyal customers become micro influencers on your behalf, creating a sustainable loop of trust and referrals.
We’ve broken down the stages of full-funnel influence; now it’s time to execute. Here are some best-practice tips for e-commerce brands and Amazon sellers to maximize influencer impact across the funnel:
Finally, always maintain authenticity in all these efforts. The magic of influencer marketing is the human touch – the feeling of a recommendation from a trusted person, not a faceless corporation. Empower your influencers to be honest, creative, and true to their voice. Audiences can sense authenticity, and in 2025, authenticity = influence = conversions.
To recap, here’s a quick overview of how influencer strategies align with each stage of the buyer’s journey:
Funnel StageGoalInfluencer ActivitiesKey MetricsAwareness (Top)Generate brand awareness; reach new audiences.
– Social media posts (Instagram Reels, TikToks, etc.)
– Giveaways & hashtag challenges for virality
– Shout-outs and product unboxings to introduce product
Impressions, reach;
Engagement (likes, shares, comments);
Follower growth; traffic spike
Consideration (Mid)Build trust and interest; educate consumers.
– Product review videos or blog posts
– Tutorials/how-to content featuring the product
– Live Q&A sessions or demos
– Influencer testimonials and UGC sharing
Engagement quality (comment sentiment, saves);
Click-throughs to website or product pages;
Time spent on content;
Social shares of reviews
Conversion (Bottom)Drive purchase action; convert interest into sales.
– Affiliate & promo codes shared by influencers
– Shoppable posts and swipe-up links
– Livestream shopping events (Instagram Live, Amazon Live)
– Retargeting ads using influencer content (whitelisted ads)
Conversions (sales) attributed to influencers;
Conversion rate of influencer traffic;
Number of uses of promo code;
Cost per acquisition (CPA), ROI
Loyalty (Post-purchase)Encourage repeat business and word-of-mouth advocacy.
– Customers posting about their purchase (UGC)
– Brand ambassador programs (long-term influencer relationships)
– Featuring customer reviews and content on brand channels
– Community engagement (forums, groups with influencer involvement)
UGC volume (posts, stories shared by customers);
Repeat purchase rate;
Referral traffic or sales;
Customer lifetime value increase
Each stage feeds the next. A well-executed full-funnel influencer strategy creates a continuous loop: broad awareness fills the pipeline, consideration content nurtures that interest, conversion tactics seal the deal, and post-purchase advocacy brings in new prospects via happy customers. By viewing influencer marketing holistically, brands can achieve synergy that isolated campaigns miss.
The era of treating influencer marketing as a one-off experiment or a vanity project is over. Full-Funnel Influence – from awareness to conversion in 2025 – is a proven playbook for growth. Brands that embrace influencers and content creators at every stage are reaping the rewards: more authentic engagement, higher conversion rates, and a treasure trove of reusable content and insights. For e-commerce brands and Amazon sellers, this approach can be especially potent – it builds a bridge of trust from social media scroll to checkout cart, addressing consumer needs at each step.
As you plan your marketing strategy, think about how you can integrate influencers into each phase of your funnel. Maybe it’s partnering with a niche TikTok creator to spark awareness, then using their content in ads and on your Amazon page to drive consideration and conversion. Maybe it’s turning your best customers into ambassadors who regularly post UGC. The specific tactics will vary, but the guiding principle remains: meet your customers where they are, with messages they trust, delivered by voices they relate to.
In 2025, leveraging full-funnel influencer marketing isn’t just innovative – it’s becoming essential for staying competitive. So start building those relationships with micro influencers and creators, align them with your funnel objectives, and embrace a data-driven approach to optimize results. The brands that do will turn influence into revenue, and followers into loyal customers. Now’s the time to broaden your vision of influencer marketing – from a single post to a sustained journey – and watch the impact on your business grow from top to bottom.
Imagine tuning into a B2B webinar and seeing a content creator you follow leading the discussion. This scenario is becoming common as B2B brands tap creators for live events like webinars and virtual panels. In fact, webinar influencers – industry experts, micro influencers, and niche thought leaders who co-host or speak at live B2B events – are reshaping how brands engage audiences. Why the shift? Because buyers today trust people over logos. By partnering with credible creators, even traditionally buttoned-up B2B companies can inject authenticity, energy, and wider reach into their webinars. For e-commerce brands and Amazon sellers, there’s a valuable lesson here: leveraging influencer marketing beyond social posts – such as through live webinars, streams, or workshops – can humanize your brand, build trust, and drive conversions in a way static content often can’t.
What you’ll learn: In this post, we’ll explore how and why B2B brands are embracing webinar influencers to supercharge engagement. We’ll break down the benefits of inviting content creators to your live events, best practices for running an influencer-powered webinar, and how these tactics can apply to e-commerce (from Amazon Live sessions to user-generated content). By the end, you’ll see why influencer marketing isn’t just for trendy consumer brands – it’s also a game-changer for B2B and online sellers alike. Let’s dive in.

B2B marketers have discovered that influencer marketing isn’t only for flashy product endorsements – it can drive serious business results in professional arenas too. One standout format is the webinar (or other live virtual events) featuring influencers. Consider these telling statistics:
In sum, B2B brands are turning to webinar influencers to make their events more engaging, credible, and far-reaching. An influencer’s name and following can attract larger audiences to register for a webinar. Their authenticity and expertise keep viewers hooked – which is gold for nurturing leads in long sales cycles. And because webinars allow for live Q&A and interaction, the influencer can humanize the brand, answering questions in real-time and weaving in personal anecdotes or user-generated content (UGC) that resonates more than corporate slide decks.
So what does it look like when a B2B brand teams up with a creator for a live event? There are a few popular collaboration models:
No matter the format, the collaboration should be a win-win. The brand gains engaging content and extended reach, while the influencer gains exposure, networking, and often an honorarium or sponsorship. Importantly, the content must feel authentic. The creators are encouraged to share their honest perspectives or personal stories, not a rigid script. This authenticity is what makes influencer-led events resonate. As one marketing expert put it, audiences can sense when content is genuine “thought leadership” versus a disguised ad – and they respond much more favorably to the former.
Why exactly do micro influencers and creators make such a difference in live events? Let’s break down the key benefits, many of which apply to B2C brands as well:
Quick Case in Point: Lenovo, a tech hardware giant, launched a webinar series called “Late Night I.T.” hosted by a tech influencer (who happened to be a comedian) instead of a company executive. The result was tech talk that was entertaining and accessible, drawing in IT professionals who might ignore standard marketing webinars. Lenovo saw 300 million impressions and a big lift in brand favorability from the series. The takeaway? An influencer host with a fresh style turned a dry B2B topic into must-watch content.
To emphasize how central webinars have become in B2B influencer marketing, here’s a quick comparison of content formats by their usage in B2B campaigns:
B2B Influencer Content FormatUsed by Programs (%)Live Webinars & Virtual Events81% (most-used)Social media content (posts, videos)74%Blog posts and articles71%
As the table shows, live events have edged out even social media as the favored way to leverage influencers in B2B. Think of webinars as the new webinars (pun intended) – they’re now a mainstream marketing channel, not a novelty. And notably, these trends mirror what’s happening in consumer marketing too: live content is on the rise everywhere. For example, on the e-commerce side, brands are increasingly doing live shopping streams on Instagram, TikTok, and Amazon Live to drive immediate sales, often hosted by micro influencers. It’s all about real-time engagement.

If you’re ready to try a webinar or live event with a creator, keep these tips in mind for success:
1. Choose the Right Influencer: Look for someone who aligns with your niche and whose audience matches your target. In B2B, that might be a thought leader with deep expertise (e.g. a cybersecurity analyst for a security software webinar). For an Amazon seller, it could be a YouTuber known for reviewing products in your category. Micro influencers can be ideal – their followings are small but highly engaged and relevant. Ensure the person has credibility (B2B buyers value subject matter expertise over fame). Also, vet for professionalism: you want a partner who will show up on time, collaborate on content, and represent your brand values appropriately.
2. Co-Create the Content: Work with your influencer to plan the event agenda or topic. Provide them with background on your audience and goals, but also let them inject their own angle or stories – that’s why they’re there! For example, you might outline key product points to mention, but allow the influencer to frame it as a personal case study or a “tips and tricks” session rather than a formal demo. Collaborate on a catchy title for the webinar that includes the influencer’s name or a topic they’re passionate about (this can boost registrations). When the content is co-created, it feels authentic and balanced between the brand and the creator’s voice.
3. Promote Widely (Leverage Both Networks): One huge advantage of influencer webinars is the combined promotional firepower. Coordinate promotion with your influencer: both parties should announce the event on social media, newsletters, etc. The influencer’s followers trust their recommendations, so a simple “Join me for a live session with next week” post can drive sign-ups. Provide the influencer with easy-to-share graphics, a unique registration link, and key points to excite their audience. Meanwhile, you should feature the influencer prominently in your promotions (“Special Guest: , Top Creator”) to pique interest. This cross-promotion is key to maximizing reach.
4. Make it Interactive: During the event, plan for interaction. Live polls, Q&A segments, shout-outs to attendees – these keep the energy up. Many influencers naturally do this (taking viewer questions on the fly, etc.). You can integrate features like chat or Q&A windows if it’s a webinar platform, or simply have the host ask the audience to comment (on platforms like LinkedIn Live, YouTube, or Amazon Live). An interactive vibe not only engages the live audience but also yields feedback and UGC. For instance, an attendee’s question in chat could spark a great discussion point (and that Q&A could become a snippet you later share on your blog). Also encourage the influencer to share real examples or even stories from their followers (with permission) to make it a community conversation.
5. Comply and Be Transparent: Remember that if the influencer is being paid or given perks, disclosure rules apply – even in a webinar. Have them briefly mention at the start, “I’m excited to partner with for this session,” or add a note in the webinar description, to be transparent. In B2B, authenticity is paramount, so transparency actually builds trust. Also, ensure any advice given meets industry guidelines (especially in regulated industries). Most professional influencers are used to this, but it’s on you to provide guidance. A simple prep call to go over do’s and don’ts (e.g. avoid promising specific ROI figures, avoid off-limit topics) can prevent issues. That said, don’t script them too much – you want their genuine voice to shine.
6. Repurpose the Content: After the live event, the fun’s not over. Edit the webinar recording into bite-sized videos or quote graphics featuring the influencer’s best insights. Write a recap blog post (“5 Lessons from Our Webinar with ”). These assets can be pure gold for content marketing. You essentially get a long-form content piece (the webinar) that can be chopped into many pieces of UGC-style content. For example, if you did a live unboxing with an influencer on Amazon Live, you can take screenshots or clips to use as product photos and testimonials on your Amazon listing or website. Always get permission and discuss usage rights with the influencer in advance – most will be happy to have the extra exposure, as it showcases them as well. Repurposing maximizes ROI and keeps the influencer’s impact working for you long after the live event ended.
Following these best practices ensures that your collaboration stays smooth and yields real value. It transforms the webinar from a one-off event into a multi-faceted influencer marketing asset.
You might be thinking, “This sounds great for B2B webinars, but I run an online store – can live influencer events help me?” Absolutely. The core idea – leveraging creator-led live content to engage an audience – translates directly to the e-commerce world:
One note of caution: ensure your chosen platform and influencer align with your target customers. If you sell to Gen Z, a TikTok or Twitch live event might be ideal. If your audience is busy professionals (like many Amazon business buyers), maybe a LinkedIn Live lunch-and-learn with an expert makes sense. Match the medium to your market.
“Webinar influencers: B2B brands tap creators for live events” – it’s more than a trend; it’s a fundamental shift in marketing. Whether you run a SaaS company or a Shopify store, incorporating live, influencer-driven content can elevate your brand’s engagement to new heights. By blending the credibility and creativity of content creators with the interactive power of webinars/live streams, you turn passive audiences into active participants. B2B brands have proven this approach drives both trust and tangible ROI – from higher webinar attendance and lead conversions to boosted brand perception. E-commerce sellers are likewise seeing that live influencer sessions can drive immediate sales and build a passionate customer community around their products.
As you plan your marketing strategy for 2025 and beyond, consider where a live collaboration could make an impact. It could be a thought leadership webinar series co-hosted by industry micro-influencers. It could be a seasonal live shopping event on Amazon or Instagram with a creator demonstrating your top products. Start small if needed – perhaps a 20-minute live Q&A on LinkedIn with a happy customer or niche expert. The key is to experiment with letting real voices carry your message.
In a world saturated with ads and automated content, going live with an influencer is a breath of fresh air that audiences appreciate. It’s authentic, it’s engaging, and it blurs the line between brand content and genuine conversation. That’s exactly the kind of marketing that builds long-term trust and loyalty. So don’t hesitate to step in front of the camera (with a friendly influencer by your side) and start a real-time dialogue with your audience. Whether you’re B2B or B2C, enterprise or Amazon seller, leveraging webinar influencers and live events can humanize your brand and supercharge your growth.
In today’s fast-paced social media world, viewers scroll in a heartbeat – especially on platforms like TikTok and Instagram. For e-commerce brands and Amazon sellers, capturing attention quickly is key. One clever trick? Speeding up your videos. How to speed up a video on iPhone might sound technical, but it’s actually simple and can transform a slow demo into a snappy, engaging clip. By condensing footage into a shorter span, you inject energy into product demos, unboxings, or tutorials that keep viewers hooked. Micro influencers and content creators often use this hack to turn lengthy processes (like makeup tutorials or DIY assembly) into exciting time-lapses that boost engagement. In this guide, we’ll explain four easy methods to speed up iPhone videos – using built-in iPhone tools (like iMovie and the Camera’s Time-Lapse mode), social apps (Instagram Reels and TikTok), and a popular third-party editor (CapCut). You’ll also get pro tips on editing fast-motion clips and ideas for leveraging these techniques in your influencer marketing and UGC content strategy.
Ready to save time and impress your audience? Let’s dive into how to speed up iPhone videos step by step.

One of the easiest ways to fast-forward a video on your iPhone is by using Apple’s free iMovie app. iMovie comes with a straightforward speed adjustment tool, so you can take a normal video and make it play faster (great for trimming down a long clip into a quick highlight). Here’s how to do it:
Using iMovie is great for speeding up a pre-recorded video while still allowing further edits (trimming, adding music, etc.). For instance, you might record a product demonstration that’s 5 minutes long, then use iMovie to speed it up 2× and cut it down to 2.5 minutes. Tip: If your video has sound, note that speeding it up will also speed up the audio pitch (making voices sound like chipmunks). iMovie on Mac has a “Preserve Pitch” option, but on iPhone it’s simpler to mute the video’s audio and add a background music track or voiceover. When editing longer clips or exporting multiple projects, video processing can put heavy pressure on system memory, so knowing how to clean my Mac can help free up memory, reduce background load, and keep iMovie running smoothly, preventing slowdowns. This way, your fast-motion clip remains clear and professional without distracting high-pitched chatter.
What if you haven’t filmed anything yet, but you want to capture a scene in fast-forward from the start? The iPhone’s Camera app has you covered with Time-Lapse mode. Time-lapse is essentially auto-magical fast-forward: your camera will snap photos at intervals and stitch them into a speedy video. It’s perfect for scenarios like showing a process that takes a long time (e.g. packaging orders, a sunset, or setting up a photoshoot) in a short, satisfying clip. The best part? No editing required – your iPhone does it for you.
To shoot a time-lapse on iPhone:
That’s it! You’ll find the finished time-lapse video in your Photos app. Time-lapse videos compress hours into seconds, delivering a punchy, narrative-driven experience that grabs attention without demanding much viewer time. For example, you could condense a 30-minute product assembly into a 30-second timelapse – perfect for showing off product quality and setup in a quick Instagram Reel. Many micro influencers use time-lapse for behind-the-scenes content because it’s built-in and easy. Just remember to keep your phone charged (and maybe plugged in) for long recordings, and keep it steady to avoid shaky footage. The result will be a polished, high-speed video ready to share or edit further.
Social media apps themselves offer handy tools to control video speed without any third-party editors. If you’re creating content directly in-app (which a lot of influencers do), you can speed up your footage while recording or even after uploading a clip. Here’s how to use the built-in speed features on Instagram Reels and TikTok:
Instagram makes it easy to film Reels at faster speeds – great for fun transitions, tutorials, or any content where you want to fit more action into the 90-second Reel limit. To speed up a video on Instagram Reels:
Instagram’s built-in speed control is quick and no-fuss, ideal for content creators who want to jazz up a video on the fly. For example, an influencer might record a makeup routine at 2× speed to fit it into a 30-second Reel. Or a small business could upload a product demo and use the speed slider to create a snappy before-and-after montage. The key benefit is convenience – no extra apps needed and you can match the speed to trending audios or challenges easily.
TikTok also provides simple speed options, fitting since TikTok thrives on snappy, engaging videos. To speed up a video on TikTok:
TikTok’s speed tool is very straightforward – it essentially lets you create instant time-lapses or slow-mo effects with one tap. This is especially helpful for creators filming DIY projects, quick “before/after” transformations, or any content where a bit of fast-forward adds excitement. For example, a food blogger might show a recipe prep in 60 seconds by using 2× speed to condense the chopping and mixing. Using the app’s native tools also means you’re likely keeping the video in an optimal format for TikTok’s algorithm. And since TikTok is a hub for influencer marketing, brands can encourage their influencers to use these built-in effects to make product videos more engaging without extra editing software.
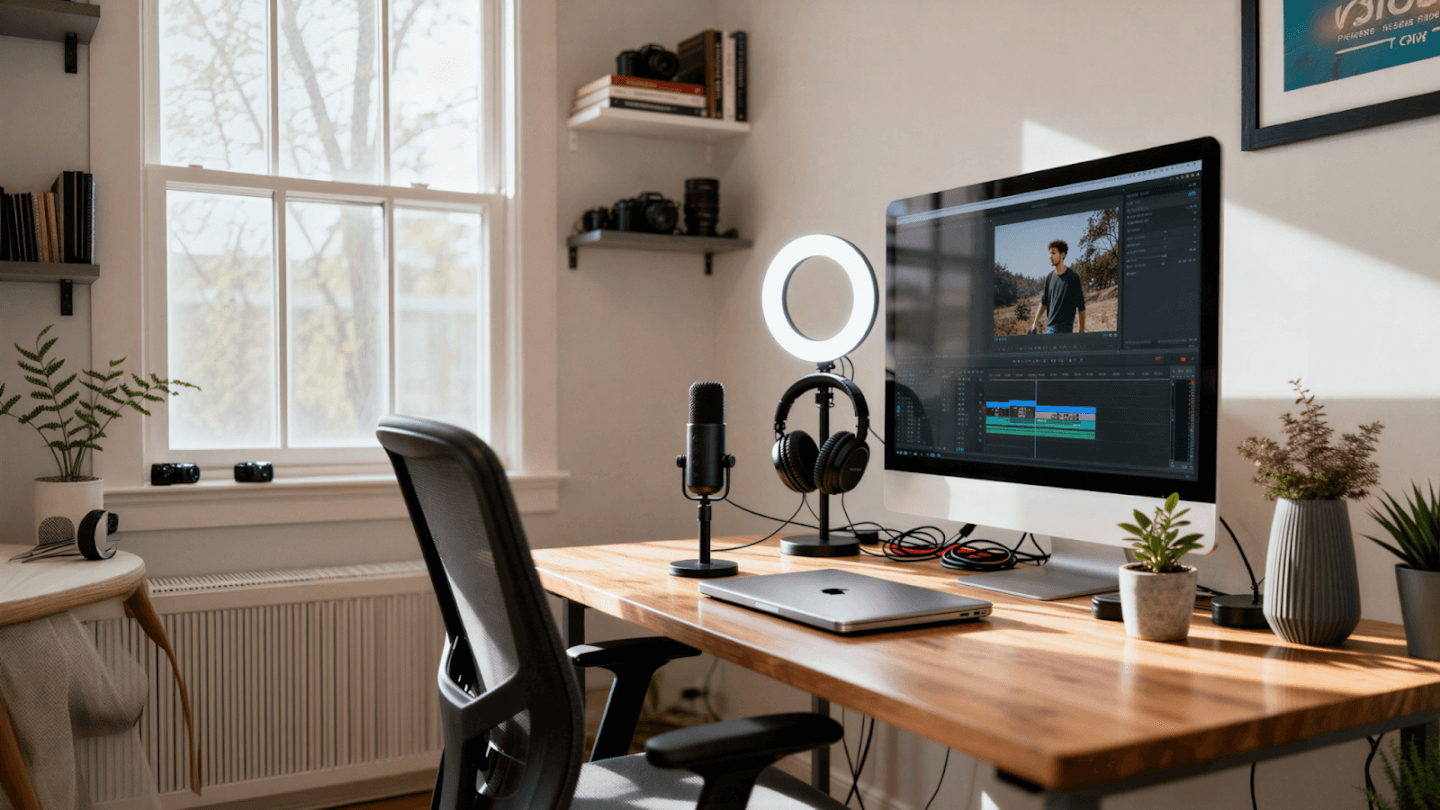
Beyond the iPhone’s own tools, plenty of third-party apps can speed up videos – often with more flexibility. One popular (and free) choice among content creators is CapCut. CapCut is a mobile video editor by the makers of TikTok, loaded with features like speed adjustments, music, text, and more. If you need finer control over your video’s speed or want to combine multiple clips with different speeds, a third-party editor like this is the way to go.
Let’s use CapCut as an example to speed up a video on iPhone:
Using a third-party app like CapCut is powerful. You get more control – for instance, CapCut’s speed range up to 100× far exceeds iMovie’s limits, and you can even speed up only sections of a clip by splitting it and applying different speeds to each part. This is handy for creative videos; for example, you might keep a section at normal speed to talk, then fast-forward a boring part, then return to normal speed for the finale. Other apps offer similar features too – from Slow-Fast-Slow (which specializes in variable speed within a clip) to editors like InShot, VivaVideo, or Adobe Premiere Rush. Most have a speed tool; the UI differs, but the concept is the same: import video → find speed control → increase speed → export. Feel free to use any editor you’re comfortable with. The goal is simply to achieve that time-saving fast-motion effect with the flexibility you need.
Table: Speed-Up Methods for iPhone Videos
MethodSpeed OptionsBest ForiMovie app (iOS)Up to ~2× normal speed (approx.)General editing after filming; basic vlogs or tutorials where you want a simple speed boost without extra apps.Time-Lapse mode (Camera)Auto-compressed high speed (hours → seconds)Capturing long processes in real-time (e.g. sunsets, project builds) as fast-forward videos with no editing needed.Instagram Reels (in-app)2×, 3×, 4× speeds built-in for recording or uploaded clipsQuick social media content; filming directly in Instagram for trendy, fast-paced Reels (product demos, transitions).TikTok (in-app)2×, 3× speeds for recording (or apply to uploads)Creating viral short videos on TikTok; easy time-lapses or sped-up challenges right in the TikTok app.CapCut app (3rd-party)Custom: 0.1× to 100× normal speed (plus speed curves)Advanced editing needs; precise control, mixing fast/slow segments, and adding music/ effects for polished content.
Speeding up your video is simple, but keep these best practices in mind to ensure your fast-motion content still looks professional and achieves your marketing goals:
By following these tips, your sped-up videos will not only grab eyeballs but also reflect well on your brand. After all, an engaging fast video can showcase a product or tell a story in seconds – but it should still be high quality and easy to follow. Whether you’re a creator editing a clip for a brand partnership or a seller making your own content, a little attention to these details goes a long way.
Learning how to speed up a video on iPhone is more than just a cool trick – it’s a smart content strategy. In an era when the average attention span is shrinking and users crave quick, catchy content, being able to condense your message is a huge advantage. A process that normally takes 5 minutes can be delivered in 30 dynamic seconds, keeping viewers glued till the end. For e-commerce brands and Amazon sellers, this means you can show more product features or tell a richer story without losing your audience’s interest. For example, at Stack Influence we often see micro influencers turn a 10-minute unboxing into a captivating time-lapse highlight – perfect for Instagram and TikTok. The fast-paced nature of these videos not only entertains but also encourages viewers to watch fully and even share, leading to higher retention and brand exposure.
By using the simple methods outlined above (iMovie edits, time-lapse mode, or in-app tools on social platforms), you can create your own high-energy clips with just an iPhone – no expensive gear needed. And don’t forget to apply the pro tips: keep it clear, add music or narration if needed, and align the speed with your story. The result? Videos that feel fresh, modern, and compelling to your audience.
Now it’s time to put this into action. Pick a product or story you want to showcase, and try speeding it up. Post that slick time-lapse or fast-forward demo to your brand’s socials or product page. You’ll likely be amazed at how a little speed can dramatically boost engagement. In the fast-moving world of 2025, creating content that keeps pace with your customers’ scrolling habits is a must. Speed up those iPhone videos and watch how quickly your audience takes notice.
In the fast-paced world of influencer marketing, brands have a tough new decision to make: Audience vs. Content. Do you choose an influencer because they have the right audience – a large following that matches your target customers – or because they create great content – high-quality, authentic posts you can leverage? This question has become the new influencer selection dilemma for e-commerce brands and Amazon sellers. In 2025, simply picking the influencer with the biggest follower count won’t cut it. Brands need influencers who both reach the right people and produce engaging, credible content.
In this post, we’ll explore why audience alignment and content quality are both critical in choosing the right micro-influencers and content creators for your campaigns. You’ll learn how focusing on the wrong factor can hurt your results, and how to strike the perfect balance to maximize authenticity, engagement, and ROI. Whether you’re an Amazon seller launching a new product or a DTC founder building your brand on social media, we’ll guide you through solving the audience vs content dilemma. Let’s dive in and find out how to get the best of both worlds in your influencer marketing strategy.
Reaching the right audience is the foundation of any successful influencer campaign. Even the most amazing post will fall flat if it’s shown to the wrong people. That’s why many brands historically chose influencers primarily for their audience metrics – follower count, demographics, and reach. Here’s why audience alignment is so important:
In short, audience matters because it ensures your message hits the bullseye. Before looking at content style, first ask: Does this creator speak to the people I want to reach? If not, even brilliant content may be wasted. As one marketing expert put it, “If the influencer’s followers don’t match your target customer, even the best content won’t drive results”. Prioritize influencers whose fan base has the same interests, pain points, and demographics as your ideal buyers. This audience-first approach is key for campaigns aimed at immediate awareness or conversions.
However – and this is a big however – focusing on audience alone is not enough. In the early days of influencer marketing, many brands learned the hard way that bigger audience ≠ better results. You might reach the right people, but if the content doesn’t resonate or seem credible, those people won’t take action. This brings us to the other side of our dilemma: content quality.
In modern influencer campaigns, content is king. The style, authenticity, and quality of an influencer’s posts can make or break your campaign, regardless of audience size. Today’s consumers scroll past inauthentic or boring posts – no matter who shared them. Here’s why the content itself is just as crucial in influencer selection:
In summary, focusing on content quality in influencer selection means looking past follower numbers and asking: Does this creator make content that will truly engage and persuade my target customers? In a sense, the influencer becomes a mini creative agency for your brand. When they produce trustworthy, relatable content, it lends your brand social proof and credibility that traditional ads can’t match. Remember, today’s consumers scroll quickly – you have only a second to catch their eye. An influencer who can stop thumbs with compelling content is worth their weight in gold. That’s why more brands are shifting from “influencers with big audiences” to micro-influencers and content creators who deliver quality and authenticity.
Now we’ve seen both sides of the equation: audience and content. Ideally, we want influencers who check both boxes – someone with an audience that matches your customers and the ability to create great content. Such ideal matches exist (often in the form of micro-influencers). But inevitably, there are trade-offs. Let’s look at how you can balance these factors and make the right choice for your campaign.
It’s helpful to directly compare a high-audience focus vs. high-content focus approach. Each has its benefits and drawbacks, and the best choice depends on your goals. The table below summarizes key differences between prioritizing audience versus content when selecting influencers:
Factor
Audience-First Approach
Content-First Approach
Primary Goal
Maximize reach to targeted consumers for awareness/sales.
Create high-quality content (UGC, reviews, etc.) for marketing.
Key Selection Criteria
Follower demographics, niche alignment, engagement rate (ensuring the influencer’s audience matches your target).
Creativity, storytelling ability, visual style, brand voice fit (ensuring the influencer’s content aligns with your message).
Key Benefits
Immediate exposure to potential customers; broad brand visibility within a relevant community; can drive quick traffic or sales if followers trust the influencer.
Authentic user-generated assets you can repurpose across ads, product pages, social media; content that builds trust and long-term brand equity; multiple uses from one collaboration.
Potential Drawbacks
Higher costs for larger reach; risk of lower authenticity if content is not great; impact may be short-lived (one-off post); success heavily reliant on influencer’s ability to actually influence (not just broadcast).
Limited direct reach from the influencer’s post (especially if they don’t have many followers); requires brand to distribute or promote the content to get full value; you might need multiple content-focused creators to match the reach of one big influencer.
Best Use-Case
Ideal for brand awareness campaigns or product launches targeting a specific demographic or region; great when you need to quickly get in front of many eyeballs that fit your customer profile (e.g., a new fashion line promoted by several niche fashion influencers to reach thousands of fashionistas at once).
Ideal for content marketing and social proof; when you need a library of authentic content (reviews, unboxings, how-to videos) to enhance your website, ads, or Amazon listings; useful for ongoing engagement where fresh content is needed (e.g., an Amazon seller collecting influencer videos to continually run as TikTok ads or to enrich product pages).
As the table suggests, neither approach is “wrong” – they simply serve different needs. Audience-first influencer selection behaves a bit more like traditional advertising (find the channels with the most relevant viewers). Content-first selection is more like bringing on talented creatives to fuel your marketing with compelling stories and visuals.
Notably, a blended strategy is often the most powerful. In fact, many savvy brands now do both: they partner with a group of micro-influencers who each have engaged niche followings (audience alignment) and can produce authentic content that the brand reuses in ads and on-site (content quality). According to recent industry stats, 65% of brands run micro-influencer campaigns for brand awareness (audience reach), while 22% specifically aim to repurpose influencer content in their ads. This shows a significant chunk of marketers are explicitly after the content itself, not just eyeballs. It underscores the point that micro-influencers are often recruited as much for their UGC-style content as for their influence.
Speaking of micro-influencers, let’s dig deeper into why they are considered the “sweet spot” in this debate.

Micro-influencers and content creators can generate authentic user-generated content (UGC) that builds trust and drives conversions for e-commerce brands.
For e-commerce brands and Amazon sellers, micro-influencers (typically defined as having ~5,000 to 100,000 followers) often hit the perfect balance of audience relevance and content authenticity. These are creators who may not be celebrities, but they have dedicated, niche followings and a relatable style of content. Here’s why micro-influencers can solve the audience vs. content dilemma:
In essence, micro-influencers often offer the best compromise between audience and content. They have audiences that are just right (not too broad, not too off-base) and content that is real (not overly produced or soulless). This is why many e-commerce marketers consider micro-influencers their go-to tier for campaigns. In a way, micros blur the line between “influencer” and “content creator” – they influence through their content’s authenticity. And importantly, micro-influencers are especially effective for Amazon sellers and niche e-commerce brands, who need both affordable marketing and convincing social proof. As an Amazon seller, for instance, getting a handful of micro-influencers to post video reviews on TikTok not only drives some traffic, but you can also edit those clips into a product montage video for your Amazon listing. That’s a double win on audience and content.
Of course, working with many micros requires coordination, and you still have to vet each one for audience fit and content quality. But with the right tools or partners, it’s very doable – and the payoff is big.
Now, the key question: How do you decide when to prioritize audience vs content, or how to balance both, for your specific needs? The answer comes down to your campaign goals and a few strategic steps. Let’s outline a plan to navigate this dilemma.
Choosing the right influencer doesn’t have to be a shot in the dark. By following a structured approach, you can ensure you’re weighing both audience factors and content factors to find the optimal partners. Here’s a step-by-step strategy for e-commerce brands and Amazon sellers to balance audience vs. content considerations:
By following these steps, you essentially create a balanced scorecard for influencer selection. You won’t fall into the trap of only chasing big follower counts, nor the trap of ignoring audience fit because you fell in love with someone’s content who doesn’t actually influence your potential buyers. The key is alignment – ideally you want relevant reach and resonant content. When in doubt, revert to your goals: if forced to choose, prioritize the factor (audience or content) that directly serves your main objective, but try to include a mix to cover all bases.
In the “Audience vs. Content” debate, the real answer for brands in 2025 is not to choose one over the other, but to smartly balance both. A successful influencer campaign is like a coin with two sides: on one side, the audience gives you reach and exposure to the right buyers; on the other, the content builds trust and motivates those buyers to act. If you neglect either side, your results will suffer – a perfectly targeted audience won’t convert if the content is uninspiring, and even the best content won’t drive sales if it’s not reaching the right people.
The good news is that by understanding this dilemma, you’re already ahead of many competitors still chasing the wrong metrics. Instead of asking “audience or content?”, you can reframe the question to: “What mix of audience reach and content quality will best achieve my goal?”. Sometimes the mix might be an influencer who brings a bit of both. Other times it might be separate strategies working in tandem. There’s no one-size-fits-all, and that’s okay – you can tailor the approach to each campaign.
In summary, the audience vs. content dilemma doesn’t have to be a tug-of-war. With a strategic approach, you can have the best of both worlds. Focus on the influencers who bring true influence – not just in numbers, but in the quality of conversations they spark. Those are the collaborations that feel like a natural fit and yield win-win outcomes for everyone: the influencer, the audience, and your brand.
Ready to put this into action? Start by reviewing your next campaign’s goal and apply the steps above. Whether you engage one perfect influencer or a crew of ten, you’ll do so with a clear vision of why they’re the right choice. By solving the audience vs. content dilemma, you’ll unlock influencer partnerships that drive real value – more authentic engagement, more trust in your brand, and ultimately more sales. In today’s social media landscape, that balance is the competitive edge that will set your e-commerce marketing apart. Embrace the balance, and watch your influencer campaigns thrive.
TikTok isn’t just for dance challenges anymore – it’s become a serious e-commerce engine. With over 150 million U.S. users (and billions worldwide) on TikTok, content creators have turned the platform into a revenue goldmine. Trends like #TikTokMadeMeBuyIt show how viral videos can drive real sales for brands. In fact, a whopping 92% of TikTok users take action (like visiting a site or adding to cart) after watching a TikTok video, and 37% have purchased something they discovered on the app. For e-comamerce brands and Amazon sellers, this means TikTok isn’t just about entertainment – it’s a legitimate marketing channel where creative content can lead directly to conversions.
How do TikTokers make money from all this activity? In this post, we’ll break down the key monetization strategies TikTok creators use in 2026, from TikTok’s built-in programs to influencer partnerships and beyond. Whether you’re a DTC brand owner, an Amazon seller, or a budding content creator, you’ll learn what revenue streams exist on TikTok and how you can tap into these trends. Let’s dive into the money-making side of TikTok and see what opportunities it offers for creators and brands.
TikTokers (TikTok content creators) earn income through a variety of channels. The beauty of TikTok’s ecosystem is that creators can diversify their earnings – much like a business with multiple product lines. Below is an overview of the main ways TikTokers make money, and how each method works:
Monetization Method
How Creators Earn
Brand Opportunity
TikTok Creator Fund & Programs
TikTok pays creators for high video views and engagement (new Creativity Program pays per view)
N/A (platform-driven payouts to creators)
Brand Sponsorships
A company pays the creator to feature or review a product (in cash or freebies)
Brand gets authentic exposure to the creator’s audience (influencer marketing)
Affiliate Links
Creator earns a commission for product sales via special links or codes (e.g. Amazon Associates)
Brand only pays when a sale is made; drives performance-based sales
TikTok Shop & Social Commerce
Creators sell products directly on TikTok (their own merch or partner products) and earn profits or commissions
Brands can list products on TikTok Shop and partner with creators to promote them, streamlining in-app purchases
Fan Gifts & Tips
Viewers send virtual gifts, tips, or donations during live streams or on videos; creators redeem them for cash
Signals strong engagement; brands can sponsor live events or capitalize on fan enthusiasm (e.g. co-hosting live shopping)
Exclusive Content/Subscriptions
Fans pay for premium content (TikTok Series, Patreon, memberships) for extra videos or shoutouts
Creators build loyal communities; brands could collaborate on exclusive content or offer special deals to subscribed fans
Merchandise & Digital Products
Creator sells their own merchandise (shirts, apps, courses, etc.) directly to followers for profit
Potential brand collaborations on co-branded merch or featuring creator-designed products to new customers
As the table shows, some income streams come directly from TikTok (through its Creator Fund, new programs, or gifts), while others come from brands and fans outside the platform. Top TikTokers often juggle several of these at once. Notably, creators are increasingly diversifying beyond brand deals, meaning they’re not relying on just one method. For brands, this diversity is a chance to engage creators in different ways – from traditional sponsored posts to affiliate partnerships or even using creators’ content in ads.
Let’s explore each major monetization strategy in detail and see what it means for both TikTok creators and the e-commerce brands looking to work with them.
One of the most lucrative ways TikTokers make money is through influencer marketing deals – essentially, partnering with brands. A TikToker might promote a product in a video, do a review, or incorporate a brand’s item into a trend. In return, the brand pays them a fee, provides free products, or both. These brand sponsorships and shout-outs have become a primary income stream for many creators.
Why are brands so eager to work with TikTok influencers? Authenticity and reach. TikTok’s algorithm can catapult a single video to millions of views, and a creator’s genuine endorsement feels more trustworthy to viewers than a traditional ad. According to industry data, 73% of brands prefer to work with micro and mid-tier influencers (rather than mega-celebrities) because they offer the best engagement for the cost. In other words, a creator with 10,000 highly engaged followers might drive more sales than a celebrity with a million lukewarm followers.
Brands large and small are thus investing heavily in TikTok collaborations. In fact, 80% of companies maintained or increased their influencer marketing budgets in 2026. For e-commerce startups or Amazon sellers, teaming up with a TikTok creator is a cost-effective way to showcase products to niche audiences. For example, an Amazon seller might send a popular gadget to a tech-review TikToker, who then demonstrates it to their followers. If the content feels authentic and entertaining, it can spark a “TikTok made me buy it” ripple effect.
Micro influencers (those with roughly 1k–50k followers) are particularly attractive to brands on a budget. They charge lower fees but often have very loyal audiences. Their recommendations feel personal, not like ads. A micro-influencer might even agree to promote a product in exchange for free samples or a small commission per sale – making them an affordable marketing channel for new e-commerce brands. Platforms like Stack Influence help brands connect with vetted micro influencers at scale, streamlining these collaborations and ensuring the content aligns with brand goals.
From the TikToker’s perspective, brand deals can range from one-off sponsored videos to long-term ambassadorships. The income varies widely – top TikTok stars might command thousands of dollars per post, whereas micro influencers might earn $50–$500 or just free products. The key for creators is to partner with brands that fit their niche and audience interests (a fitness influencer promoting gym wear, a beauty creator doing makeup tutorials with a new cosmetics line, etc.). When the fit is right, these sponsored posts come off as genuine recommendations rather than forced ads, benefiting both parties.
Tip for Brands: When working with TikTok creators, give them creative freedom. Rigid scripts or overly salesy messaging won’t resonate with TikTok audiences. It’s the creator’s authentic voice and storytelling – sometimes humorous, sometimes candid – that engages viewers. Trust them to know what content clicks with their community. Also, consider leveraging user-generated content (UGC) rights: you can ask the influencer for permission to repurpose their video as an ad (e.g. TikTok Spark Ads) to reach even more people. In 2026, 66% of brands plan to repurpose micro-influencer content in TikTok ads, underlining how valuable influencer-made videos are for marketingjoinstatus.com.
TikTok has been rolling out features to help creators earn money directly on the platform. These are programmatic ways TikTok rewards popular or engaging content, allowing TikTokers to monetize without needing an outside sponsor. Key built-in monetization tools include:
TikTok’s Creator Fund (launched 2020) was an early program that pays creators for video views. In 2023, TikTok introduced the new Creativity Program as an upgraded version, aiming to increase payouts. Under this model, eligible creators (typically 10,000+ followers and a certain number of recent views) can earn around $0.40–$1.00 per 1,000 views on their videos – a significant boost from the old fund’s rates. Essentially, TikTok shares ad revenue with creators based on how well their content performs. While the per-view earnings sound small, they add up when videos get millions of views.
Creators don’t have to do anything “extra” to make this money aside from creating content that attracts eyeballs. However, it’s not a path to riches for everyone – a video with 100k views might net under $100. Still, for active TikTokers, the Creator Fund/Creativity Program provides a nice baseline income every month. It’s also a badge of credibility (viewers know these creators are recognized by TikTok).
Brand angle: There isn’t a direct role for brands here, but it’s worth knowing that creators are incentivized to make content that gets high engagement (since it boosts their TikTok payout). Entertaining, informative, or trend-worthy videos do best. As a brand, if you create your own TikTok content or partner with a creator, focus on quality and engagement – that’s what TikTok’s algorithm (and payment system) rewards.

Going live on TikTok isn’t just a way to chat with followers – it’s also a money-maker. During a TikTok LIVE stream, viewers can purchase and send virtual gifts (animated icons like roses, hearts, etc.), which the streamer later converts into real currency. TikTok’s virtual gifting economy allows fans to tip their favorite creators as a form of appreciation. Likewise, TikTok has introduced a direct tipping feature on profiles for select creators, enabling one-time donations outside of live videos.
For example, a cooking influencer doing a live recipe might receive gifts throughout the broadcast – perhaps a viewer sends a gift worth 100 coins (TikTok’s in-app currency) to thank them for a great tip. Those coins accumulate and translate into actual dollars for the creator (after TikTok’s cut). Over many live sessions, this can become substantial income. Some TikTokers report making $20–$300 per live session, and one creator even earned $34,000 in a single month just from live streaming.
From a brand’s perspective, live streams can be like interactive commercials or shopping events. Live shopping is growing: brands partner with creators to showcase products in livestreams where viewers can ask questions and see demonstrations in real-time. If your brand has an engaging personality (either an in-house host or an influencer ambassador), TikTok LIVE can drive immediate sales – viewers can often click to purchase featured items directly from the live video.
In 2023 TikTok rolled out Series, a feature that lets creators put out premium content behind a paywall. Think of it as TikTok’s version of selling episodes or a mini-course: a creator can package a set of longer videos (up to 20 minutes each) and charge viewers a one-time fee to access that series. Only fans who pay can watch those exclusive videos.
For example, a fitness trainer on TikTok might create a 10-part workout program series – complete with detailed exercise routines – and charge $9.99 for access. Their regular short TikToks remain free and act as teasers, but hardcore fans who want the full program pay for the series. TikTok allows creators to set prices from about $1 up to $190 for a series, and it’s experimenting with generous revenue shares to entice creators to use the feature (in some regions, TikTok now lets creators keep up to 90% of subscription revenue from features like Series).
For brands, TikTok Series could be a way to collaborate on deeper content. A skincare brand might sponsor a beauty creator’s “Skincare Masterclass” series, for instance – either by paying the creator to include their products or by co-creating a series and splitting revenue. This is a newer area, but it highlights TikTok’s push into longer-form, paid content to compete with platforms like YouTube.
TikTok has blurred the line between social media and shopping with TikTok Shop and related e-commerce features. TikTok Shop allows creators and businesses to sell products directly within the app (with product links embedded in videos or a shopping tab on profiles). Creators can earn money here in a couple ways:
The impact is huge: TikTok reports that 71% of TikTok Shop users have bought something after seeing it on their feed, and over half of TikTok users have made an impulse purchase on the platform. For brands, getting your products into TikTok Shop and partnering with creators who can showcase them is a powerful strategy. Imagine a home decor brand working with a DIY TikToker – the creator’s video of a room makeover features lamps and pillows that viewers can tap to buy without leaving TikTok. This frictionless shopping experience can dramatically increase conversion rates.
TikTok is effectively becoming a social commerce platform. Amazon sellers should note: while Amazon remains a separate ecosystem, TikTok trends often spill over to Amazon (“TikTok made me buy it” products frequently top Amazon’s charts). Some Amazon sellers use TikTok to drive traffic to their Amazon listings via affiliate links or by becoming Amazon Influencers (who earn commission on Amazon purchases they inspire). Others are eager to see TikTok Shop expand in the U.S., as it could become another huge sales channel alongside Amazon’s marketplace.
Another major way TikTokers earn money is through affiliate marketing – promoting products in exchange for a cut of the sales. Unlike a flat sponsorship fee, affiliate deals pay out only when viewers buy something using the creator’s link or promo code. This model has become popular on TikTok, especially for product review and “Amazon Finds” style creators.
Here’s how it works: a TikTok creator joins an affiliate program (for example, the Amazon Associates program or a brand’s own affiliate scheme). They then feature the brand’s product in a video – maybe a gadget unboxing, a fashion try-on, or a before-and-after using a beauty product – and include a special referral link (in bio or via TikTok Shop) or a discount code. When a viewer purchases the item using that link/code, the creator earns a commission (often anywhere from 5% to 20% of the sale price, depending on the program).
For instance, a TikTok user might say, “Check out these kitchen gadgets that are total game-changers!” and in the comments or their bio, provide an Amazon affiliate link. If hundreds of viewers click and buy, the commissions roll in. Creators like this essentially act as charismatic salespeople, and some can make thousands per month if a product goes viral.
Amazon sellers benefit greatly from affiliate-minded TikTokers. Trends such as “#AmazonFinds” or “TikTok made me buy it” often involve creators showcasing cool products available on Amazon. Those creators might have an Amazon Influencer storefront (a curated page of recommendations) or use Amazon affiliate links. Amazon wins by selling the product, the seller wins by getting the sale, and the TikToker gets a commission – a triple win. (By one estimate, over a third of TikTok users have made a purchase after seeing a product on the platform—so this is a channel Amazon sellers shouldn’t ignore.)
From the brand side, affiliate deals are low-risk, high-reward. You’re essentially getting advertising for free and only paying a commission when a sale actually happens. For this reason, many e-commerce companies are setting up affiliate programs targeting TikTok creators. It broadens their pool of promoters beyond the few they might pay for sponsored posts.
To do affiliate marketing right, creators need to maintain trust. TikTok audiences can sniff out when someone is pushing too hard to make a sale. Successful affiliate TikTokers often frame products as genuine recommendations or “things I use every day” rather than ads. They also tend to focus on niches – a fitness creator might affiliate-sell gym gear and health supplements, whereas a mom influencer might share baby gadgets. By choosing products that truly match their audience’s interests, they drive more conversions (and keep their credibility intact).
Pro tip for brands: Provide your affiliates with a special discount code for their followers. For example, “Use code JANE10 for 10% off.” This gives viewers an extra incentive to buy (who doesn’t love a discount?) and lets the creator promote the deal more enthusiastically. Plus, it helps you track sales per creator easily. Ensure your website or Amazon listing is mobile-friendly and that the checkout is smooth – TikTok traffic is mostly mobile, so any hiccup can lose a sale.

TikTokers can also earn income directly from their fans, outside of the TikTok app. If a creator has built a loyal following, some followers are willing to pay for extra access, content, or recognition. Here are common ways creators monetize fan support:
While these methods might happen off TikTok, they are fueled by TikTok fame. It demonstrates the broader creator economy in action: once you build an audience, you can monetize that audience in various ways beyond just ads. Content creators essentially become micro-entrepreneurs, launching merchandise lines or subscription services around their personal brand.
For e-commerce companies, fan-driven monetization isn’t a direct revenue stream, but it’s worth noting. A creator who has an engaged community of paying members likely has a lot of influence. Those fans trust them enough to pay them monthly – which means any brand endorsement from that creator will carry significant weight. Brands might even sponsor a creator’s Patreon content or provide a special deal just for that creator’s paying members (e.g., a bonus product sample for patrons only).
UGC Creators – a special case: Not everyone making money with TikTok is doing it on TikTok. A growing trend is UGC creators – people who may not be TikTok-famous themselves, but create TikTok-style videos for brands to use. Brands are actively seeking authentic-looking content for ads, and they’ll pay talented creators to film product reviews or demo videos that the brand can post on its own TikTok or run as ads. These UGC creators get paid per video, without needing a huge following of their own. It’s a way to monetize video skills and creativity without being an influencer. If you’re a brand struggling to produce relatable TikToks in-house, hiring UGC creators (through platforms or agencies) can be a smart shortcut. And if you’re an aspiring creator who isn’t into “being an influencer,” this can be a viable income stream — brands will pay for good content even if you have zero followers, because they just want to use the content in their marketing.
The creator monetization landscape on TikTok in 2026 is richer than ever. From brand-sponsored videos and affiliate product hauls to TikTok’s own revenue programs and fan-funded projects, TikTokers have a toolkit of income streams at their disposal. Crucially, they are leveraging multiple channels – a creator might earn a base salary from the TikTok Creativity Program, big chunks from a few brand deals, steady trickles from affiliate links, and bonus cash from live gifts all in the same month. This diversification has turned top creators into savvy entrepreneurs running mini-media businesses.
For e-commerce brands and Amazon sellers, the rise of TikTok monetization presents a huge opportunity. When you understand how TikTokers make money, you can craft partnerships that align incentives on both sides. For example, offering an affiliate commission to a micro influencer may motivate them more than a one-time fee, because they’ll earn as they drive your sales. Or, collaborating with a creator on a limited-edition product (merch collab) can excite their fanbase and give you a sales boost. Even simply using TikTok’s powerful algorithm yourself – by creating engaging content or running ads – can pay off in increased store traffic and revenue, as so many brands have discovered through #TikTokMadeMeBuyIt moments.
In summary, TikTok has evolved into a platform where content creators and commerce intersect. A silly viral video can sell out a product line overnight, and a well-executed influencer campaign can put an unknown brand on the map. If you’re not already leveraging TikTok in your marketing strategy, you might be missing out on the social commerce wave. The good news is that even on a modest budget, you can find micro influencers or UGC creators who will create impactful TikTok content for your brand. Embrace the creativity and authenticity that define TikTok – it’s the currency that turns views into engagement, and engagement into sales.
Holiday shoppers increasingly turn to social media for gift ideas (a hashtag symbol made of cinnamon sticks). The holiday season is a critical time for e-commerce brands and Amazon sellers to shine online. One simple yet powerful tactic is leveraging Christmas hashtags on platforms like Instagram and TikTok to get your products and content in front of festive shoppers. Why does this matter? Because consumers are scrolling and searching: 80% of shoppers plan to use social media as much or more than last year to find holiday gifts (with social now the #1 inspiration source for Gen Z and Millennials). Using the right seasonal hashtags can help your posts appear in those searches and feeds, driving more eyes to your brand. In this post, we’ll explore how Christmas hashtags work, how to find the best ones for 2025, and ways to combine them with micro-influencer marketing and UGC (user-generated content) to boost holiday sales. Let’s unwrap the strategy!
Holiday hashtags aren’t just cute additions – they’re a discovery tool that can amplify your reach. On crowded platforms, a well-chosen hashtag places your content into larger conversations happening around the holidays. For example, on Instagram the broad tag #Christmas has been used in over 210 million posts, while #MerryChristmas appears on around 64 million posts. This massive volume shows the popularity of these tags, and jumping into these trending topics can expose your content to thousands of potential viewers following those hashtags. In fact, using hashtags has been shown to increase social media engagement: one analysis found that Instagram posts with hashtags get over 12% more interactions on average than those without.
From a marketing perspective, Christmas hashtags tap into seasonal interest. People actively search hashtags like #GiftIdeas, #HolidayDeals, or #ChristmasDecor when looking for inspiration. By including these in your posts, you help your product photos, videos, or ads appear in those aggregated results. The benefit is twofold: you attract new audiences (shoppers who don’t yet follow your account but are browsing holiday topics) and you stay relevant to existing followers by joining in the festive spirit.
Crucially, hashtags are free and simple to use, making them a cost-effective tactic for small businesses and Amazon sellers. During major shopping events we’ve seen how powerful social reach can be – during Prime Day 2025, social media influencers drove about 20% of online sales, converting shoppers 10× more effectively than generic social media posts. The takeaway: people pay attention to content (and the hashtags) shared by creators and communities they trust. If your brand’s holiday post or an influencer’s post about your product uses a trending hashtag, it’s more likely to surface in front of motivated shoppers. In short, Christmas hashtags help bridge the gap between your content and the customers searching for what you offer.

Not all hashtags are created equal. Using strategic Christmas hashtags is about quality and relevance, not just quantity. Here’s how to discover and select the right ones for your brand:
By combining these approaches, you’ll compile a solid list of Christmas and holiday hashtags that suit your brand. Aim for a balanced set – a few broad ones, a few niche-specific ones, maybe one branded tag, and perhaps a timely tag like the year or event (e.g., #BlackFriday, #CyberMonday if applicable). In the next section, we’ll look at some of the top Christmas hashtags and how they can be categorized for effective use.
It helps to know what some of the best Christmas hashtags are, and how they’re used. Below is a quick overview of popular tags and examples, grouped by category. Use this as inspiration when creating your own hashtag strategy:
Hashtag Category
Examples
Purpose & When to Use
Broad Holiday Themes
#Christmas, #MerryChristmas, #HappyHolidays
Huge volume tags that capture the general Christmas season. Use sparingly to join the broadest conversation, but expect high competition (your post appears only briefly due to millions of others).
Shopping & Deals
#ChristmasSale, #HolidayDeals, #GiftGuide, #LastMinuteGifts
Tags that attract shoppers looking for bargains or gift ideas. Great for e-commerce posts about sales, gift guides, and product promotions during Black Friday through late Christmas season.
Niche Interests
#ChristmasDecor, #ChristmasCookies, #ChristmasNails, #TechGifts
Targeted tags for specific topics or industries. Use these to reach communities interested in your niche (e.g. home decor enthusiasts, foodies, beauty fans, gadget lovers) actively searching holiday content in that category.
Festive Emotions & Fun
#ChristmasSpirit, #WinterWonderland, #HolidayVibes, #UglySweaterParty
These tags convey the mood and traditions of the season. They work well for lifestyle content or brand posts aiming to connect on a personal, nostalgic level (e.g. a cozy scene with your product).
Branded Campaign
e.g. #YourBrandChristmas
A unique hashtag you create for your brand’s holiday campaign or contest. Use it on all your holiday posts and encourage followers to use it when sharing UGC featuring your products. Helps build community and track engagement specifically around your brand.
Year-Specific Trends
#Christmas2025, #Xmas2025, #Holiday2025
Timely tags that include the year or current holiday. Use these to ride the wave of this year’s trending discussions (many users search by year to get the latest content). Update any year-specific tags annually (e.g., switch to #Christmas2026 next year).
As shown above, you’ll likely want to select a few from each category that make sense for your goals. For instance, a DTC skincare brand might use broad tags like #MerryChristmas, a deal tag like #HolidayDeals, a niche tag like #BeautyGifts, and their own branded hashtag in one post. Meanwhile, an Amazon seller listing tech gadgets might lean into #TechGifts, #GiftGuide, and #Christmas2025 to target gift-shoppers. The key is to mix and match in a natural way. Avoid using too many hashtags in one post – it can look spammy. On Instagram, you’re allowed up to 30 tags, but studies suggest using around 3–5 well-chosen hashtags is most effective for engagement. On TikTok, a handful of relevant hashtags (often 3–4, including any trending challenge tags) is usually sufficient since TikTok’s algorithm also factors in caption keywords and sounds.
Hashtags alone can boost your visibility, but combining them with influencer marketing and UGC can truly supercharge your holiday campaign. Here’s how:
Leverage Micro-Influencers: Micro-influencers are content creators with smaller (but highly engaged) followings, often in a specific niche. Collaborating with micro-influencers for holiday promotions can yield big results for e-commerce brands. Why? Because their audiences trust them and interact more – micro-influencers inspire up to 60% more engagement than their macro-influencer counterparts. When a micro influencer showcases your product in a Christmas-themed post or video and uses popular Christmas hashtags, their recommendation comes off as authentic and reaches exactly the community you want. For example, a micro-influencer in the baking niche might post a recipe video for holiday cookies featuring your brand’s ingredient, tagged with #ChristmasCookies and #BakingHolidays, driving both interest and credibility. Even though their follower count is modest, you’re likely to see higher engagement rates and conversion from that audience than you would from a generic ad. In 2025, shoppers increasingly discover products through creators – remember that social influencers drove nearly 20% of online sales during Prime Day. Tapping into that trend for Christmas is a smart move.
Encourage UGC with a Branded Hashtag: As mentioned, creating a branded hashtag can kickstart user-generated content. You might launch a holiday contest or challenge where customers post a photo or video using your product in a festive setting, and tag it with your custom hashtag (plus something like #Christmas2025). This not only spreads your brand message to the followers of each participant, but also provides you with a library of authentic content to reshare. UGC is powerful – people trust real customer experiences. In fact, a recent survey found that user-generated comments (38%) are now slightly more trusted than influencer recommendations (35%) for holiday shopping ideas. That means encouraging your real customers to share can build even more trust with new shoppers. Highlight the best submissions on your page (with permission) as part of a “holiday highlights” reel or story. It’s a win-win: customers feel heard and involved, and your brand gains organic exposure.
Cross-Promote on Multiple Platforms: Different social platforms have different strengths. Instagram is great for picturesque product photos, TikTok for viral video challenges, and even Pinterest can drive e-commerce traffic with holiday pin boards. If you partner with influencers, let them be creative on the platform where their content performs best. Just ensure they include your chosen hashtags on every platform they use – yes, even on X (Twitter) or Facebook where hashtags are less crucial, a couple of hashtags can still help categorize the post. By having a presence across channels (Instagram Reels, TikTok videos, Twitter posts, etc.), you cast a wider net. An Amazon seller, for example, might have influencers posting unboxing videos on TikTok with #AmazonFinds and #ChristmasGifts, while also sharing styled product shots on Instagram with #GiftGuide and #MerryChristmas. Multi-platform coverage increases touchpoints with potential buyers.
Tip: When working with influencers or running UGC campaigns, provide participants with a list of preferred hashtags. Mix in one or two broad ones (to piggyback on trending topics) and a few specific ones (related to your product or campaign). This ensures consistency – if everyone uses your #BrandChristmas tag plus, say, #HolidayDeals, it can even start trending in its own right, drawing more attention. Platforms like Stack Influence (which connects brands with vetted micro influencers) can simplify this process by handling the matchmaking and ensuring creators incorporate your hashtags and key messages seamlessly.
By blending hashtags with micro-influencer content and UGC, you create a marketing force multiplier. You get the extended reach of hashtags, the credibility and engagement of influencer posts, and the trust-building of real customer voices all working together. For an e-commerce brand or Amazon seller, this approach can drive substantial holiday traffic and sales without an exorbitant advertising budget.
To wrap up the strategy, keep these best practices in mind when implementing your hashtag plan:
By following these best practices, you’ll avoid the common pitfalls of hashtag marketing and make the most of every tag you deploy. It can be as simple as avoiding the ultra-generic tags that everyone uses (experts note that overly popular or generic tags like “#snow” are so saturated that they’re unlikely to help your content) and focusing on the ones that really matter to your audience.
As the holiday sales season approaches, having a solid Christmas hashtags strategy can give your e-commerce business an edge. When you thoughtfully choose hashtags – blending popular, niche, and branded tags – you make your content exponentially more discoverable to holiday shoppers scouring social media for inspiration. Combined with micro-influencer partnerships and a strong dose of UGC, those hashtags become pathways to trust and increased conversions. The beauty of this approach is that it’s agile and cost-effective, ideal for everyone from indie Shopify stores to large Amazon sellers.
In 2025, social commerce is poised to hit new heights, and brands that capitalize on trends like Christmas hashtags will capture more of that festive spending. So start brainstorming your list of hashtags, reach out to some enthusiastic content creators, and encourage your customers to share their holiday moments with your brand. By implementing these tactics, you can spread cheer and drive ROI – making this season truly the most wonderful time of the year for your business. Now, get out there and make your holiday campaign sparkle! Happy hashtagging, and may your sales be merry and bright.